In today’s digital era, we rely heavily on our smartphones for various tasks such as communication, navigation, and accessing information. With the evolution of technology, dual SIM phones have become increasingly popular, offering users the flexibility to use two different SIM cards on a single device. But what about eSIM? Can you use it simultaneously with a regular SIM card? In this article, we will explore how to use eSIM on dual SIM phones and make the most of this cutting-edge technology.
Can I use an eSIM with a regular SIM at the same time?
The answer is YES! With the advancements in technology, it is now possible to use an eSIM and a regular SIM card simultaneously in dual SIM phones. This offers you the convenience of having two phone numbers on the same device, along with the ability to maintain separate data plans, making it an ideal solution for those who travel frequently or need to separate personal and professional contacts. However, it is crucial to bear in mind that not all dual SIM phones support eSIM functionality. Before proceeding, verifying whether your device is eSIM capable is essential to ensure compatibility. By doing so, you can confidently enjoy the flexibility and benefits of simultaneous use of an eSIM and a regular SIM card.

How to use an eSIM with a regular SIM

Setting up a mobile handset with an integrated SIM, or eSIM, is becoming more and more common. Globally, more and more carriers are adopting eSIMs because they allow users to swiftly set up numerous SIM cards and switch networks without having to remove the real SIM card from their handset.
This is how to begin:
Step 1: Check eSIM compatibility
It’s crucial to confirm that your dual SIM phone supports eSIM capabilities before proceeding. Usually, the manufacturer’s website or the phone’s settings provide this information. Verifying compatibility is crucial to ensuring a smooth setup and averting any potential issues.
Step 2: Turn on eSIM
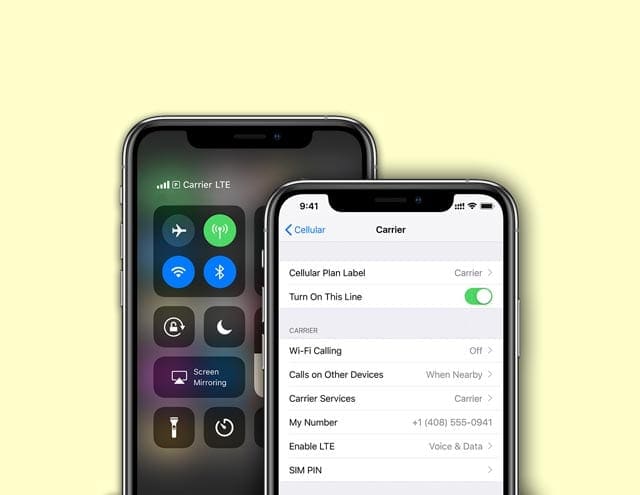
Go to the phone’s settings menu to view the SIM card settings. Seek out the option for adding or activating an eSIM. After you tap on it, you may either scan the QR code or enter the activation code that was supplied. This will start the process of your device’s eSIM addition or activation.
- This is how you accomplish it on iOS:
- Go to the Settings on your phone.
- Select Cellular or Mobile Data.
- Tap your eSIM plan (usually your “Secondary” line).
- Turn on Data Roaming.
- Tap Network Selection and choose a supported network (a list of networks is available in the eSIM’s Additional Information section).
- Additionally, here’s how to accomplish it on an Android device:
- Go to the Settings on your phone.
- Select Network & Internet or Connections.
- Tap SIM Card.
- Tap your eSIM plan.
- Turn on Data Roaming.
- Tap Network Selection and choose a supported network (a list of networks is available in the eSIM’s Additional Information section).
Step 3: Follow the setup process
Your phone will lead you step-by-step through the setup procedure when you scan the QR code or enter the activation code. Verifying the eSIM activation is essential before moving on. To choose and alter your data plan in accordance with your unique requirements and preferences, just adhere to the on-screen directions. Your phone will guide you through the process of setting up your eSIM and selecting the best data package, making the process simple.
- Set Your Default Voice Line: The next step is to configure your voice line. This number will be used for text messaging and phone calls. You should utilise your SIM for voice and text if your eSIM is data-only.
- On iOS, you may enable it as follows:
- Go to the Settings on your phone.
- Select Cellular or Mobile Data.
- Select the Default Voice Line by tapping it.
- Select your SIM line.
- Additionally, here’s how to activate it on an Android device:
- Go to the Settings on your phone.
- Tap Network & Internet or Connections.
- Tap SIM Card.
- Tap Calls and select your SIM line.
- Tap Texts and select your SIM line.
- On iOS, you may enable it as follows:
- Choose Your Cellular Data Line: Cellular data may only be used by one line at a time. That will be your US eSIM line when you are in the country.
- This is how to configure it on iOS:
- Go to the Settings on your phone.
- Select Cellular or Mobile Data.
- Tap Cellular Data.
- Select your eSIM line.
- Furthermore, here’s how to configure it on an Android device:
- Go to the Settings on your phone.
- Network & Internet or Connections.
- Press SIM Card.
- Select Data Service Network.
- Select your eSIM line.
- This is how to configure it on iOS:
Step 4: Use both SIM cards
Once the eSIM has been properly configured, you may select which SIM to use for messages, calls, and data. Generally, you may use the SIM card settings or the quick settings window on your smartphone to move between SIM cards. You may then choose the suitable SIM for your communication requirements.
It is noteworthy that the procedure for configuring your multi-SIM phone may differ significantly based on its make and model. Assisting yourself with specific queries or worries during setup may be achieved by consulting the user manual or getting in touch with the manufacturer. They have the skills and know-how to guide you through any possible problems and guarantee a successful setup.
Wrap Up
In conclusion, dual SIM phones with eSIM integration provide users with a level of versatility never before possible. This article has provided a clear guide on how to use eSIM alongside a regular SIM card, emphasizing the importance of checking compatibility before setup. As technology evolves, the simultaneous use of eSIM and regular SIM cards enhances user convenience, allowing for efficient management of multiple numbers and seamless network switching without physical SIM cards.
If this information was useful to you, please like, share, or leave a comment. We would be interested in hearing about any more advice you may have or your experiences using eSIM on dual SIM phones. Keep checking back for more thought-provoking tech guides.


