Have you ever wondered how to transfer eSIM from one iPhone to another without losing a byte of connectivity magic? Come along with us as we guide you through the steps, revealing the secrets to a perfect eSIM transfer. Ready to make magic happen? Let’s dive into the fascinating world of eSIM migration.
Related posts:
- Move eSIM from one phone to another: How to do?
- Transfer eSIM from Android to iPhone: How to do the right way?
- Transfer Google Fi eSIM to new phone: How to do it?
- Transfer eSIM from iPhone to Android: How to do?
Can I transfer eSIM from one iPhone to another?
It is usually possible to transfer an eSIM (embedded SIM) from one iPhone to another. This process may vary slightly depending on your mobile carrier and the specific iPhone models involved. Before making any changes, you should back up your data. You can use iCloud or iTunes to create a backup of your current iPhone.

Make sure that both iPhones are compatible with your mobile carrier’s eSIM service. Not all carriers support eSIM, and not all iPhone models have eSIM capabilities. Once prepared, follow our guide on how to transfer eSIM from one iPhone to another in the next part.
How to transfer eSIM from one iPhone to another?
Here’s a step-by-step guide on how to transfer eSIM from one iPhone to another. By following these steps, you should be able to successfully transfer your eSIM.
Transfer eSIM to new iPhone manually
Step 1: Navigate to settings
Unlock your iPhone and locate the “Settings” app on your home screen. Tap on it to open the Settings menu.
Step 2: Access mobile data
Once you’re in the Settings menu, scroll down until you find the option labeled “Mobile Data” or “Cellular.” Tap on it to access the mobile data settings.
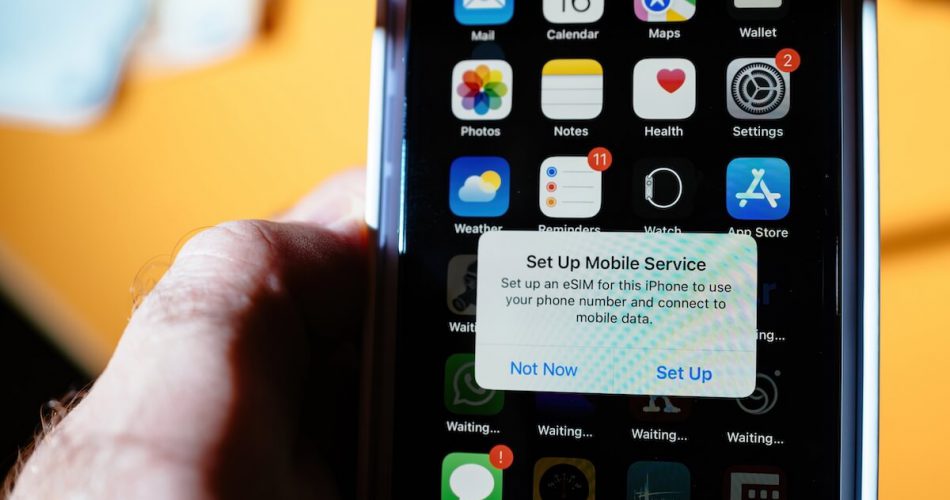
Step 3: Set up mobile service
Within the Mobile Data settings, look for an option that says “Set up mobile service“. This option may vary slightly depending on your iOS version. Tap on it to proceed.
Step 4: View mobile numbers
After selecting “Set up mobile service,” you should see a list displaying all the mobile numbers associated with your old iPhone. This list includes both e-SIM and physical SIM card numbers.
Step 5: Check transfer support
Under each mobile number, check for information related to eSIM transfer support. If your telecom operator supports automatic eSIM transfer, you should see a message indicating that. However, if the transfer is not supported, you might see a message like ‘Transfer not supported‘ under your number.
Step 6: Contact your operator
If you find that eSIM transfer is not supported by your telecom operator, it’s time to contact them for assistance. Look for the customer support contact details, usually available on their official website or through the information provided with your mobile plan.
Step 7: Verification and confirmation
Follow the operator’s instructions, verify your details (e.g., email ID), and send the required text. You’ll receive a confirmation email indicating that your eSIM transfer is in progress.

Transfer eSIM to new iPhone automatically
When switching to a new iPhone, transferring your eSIM can be easy with two convenient options: ‘Transfer from nearby iPhone‘ and ‘QR Code‘.
1. Access Settings
Go to Settings on your new iPhone, then navigate to Mobile Data, and select Set up mobile service.
2. Explore Other Options
Tap ‘Other options’ at the bottom of your screen to reveal the two transfer methods.
3. Transfer from Nearby iPhone
- Opt for this method and receive a notification on your old iPhone.
- Tap continue and input the verification code displayed on your new iPhone.
- Once the process is complete, your eSIM seamlessly transfers to the new device.
4. QR Code Transfer
- Choose the ‘QR code’ option.
- Contact your telecom operator to obtain a QR code.
- Use the camera app to scan the QR code.
- When the ‘Cellular Plan Detected’ notification appears, tap it.
- Continue at the bottom of the screen to add your data plan.
FAQs
1. How long to transfer eSIM from one iPhone to another?
The time it takes to transfer an eSIM from one iPhone to another may vary based on a number of factors, including the specific carrier, network conditions, and the efficiency of the activation process. In general, the eSIM transfer process is designed to be relatively quick and usually only takes a few minutes.
2. Where is the QR code for eSIM transfer?
The QR code for eSIM transfer is often provided by your mobile carrier when you begin the process of transferring your eSIM from one iPhone to another. This code may be sent through email, text, or available on their app or website. Alternatively, you might receive it at a physical retail store or in an activation kit. Further reading: How to get an eSIM QRcode?
Wrap up
Congratulations, you’ve mastered the way to transfer eSIM from one iPhone to another! This simple process ensures a smooth transition between devices. By following these steps, you can easily transfer your eSIM, allowing you to stay connected without interruption on your new iPhone. Keep up with technology, upgrade your device and enjoy a streamlined mobile experience.


