Starting a new chapter with your iPhone? If you’re switching from Android and want to retain your existing eSIM data, fear not! In this post, we will guide you on how to transfer eSIM from Android to iPhone smoothly. Whether you’re upgrading your device or simply exploring the features of your new iPhone, understanding the eSIM transfer process is key to maintaining an uninterrupted connection. Let’s get started!
Related posts:
- How to move eSIM from one phone to another?
- How to transfer Google Fi esim to new phone?
- How to transfer eSIM from one iphone to another?
Can I transfer eSIM from Android to iPhone?
Yes, you can transfer eSIM from Android to iPhone. This process involves deactivating eSIM on your Android device and then activating eSIM on your iPhone. Ensure both devices support eSIM technology and contact your mobile carrier to receive the QR code necessary for activation on your new iPhone.
The testing function is also important; make a test call, send a text message, or use data to make sure your eSIM works smoothly on your iPhone. Once done, you will enjoy uninterrupted connectivity on your iPhone with the transferred eSIM.
Before transfering
To ensure your eSIM transfer from Android to iPhone goes smoothly, you need to prepare carefully. Have a look at some notes before transferring eSIM from Android to iPhone:
1. Check device compatibility
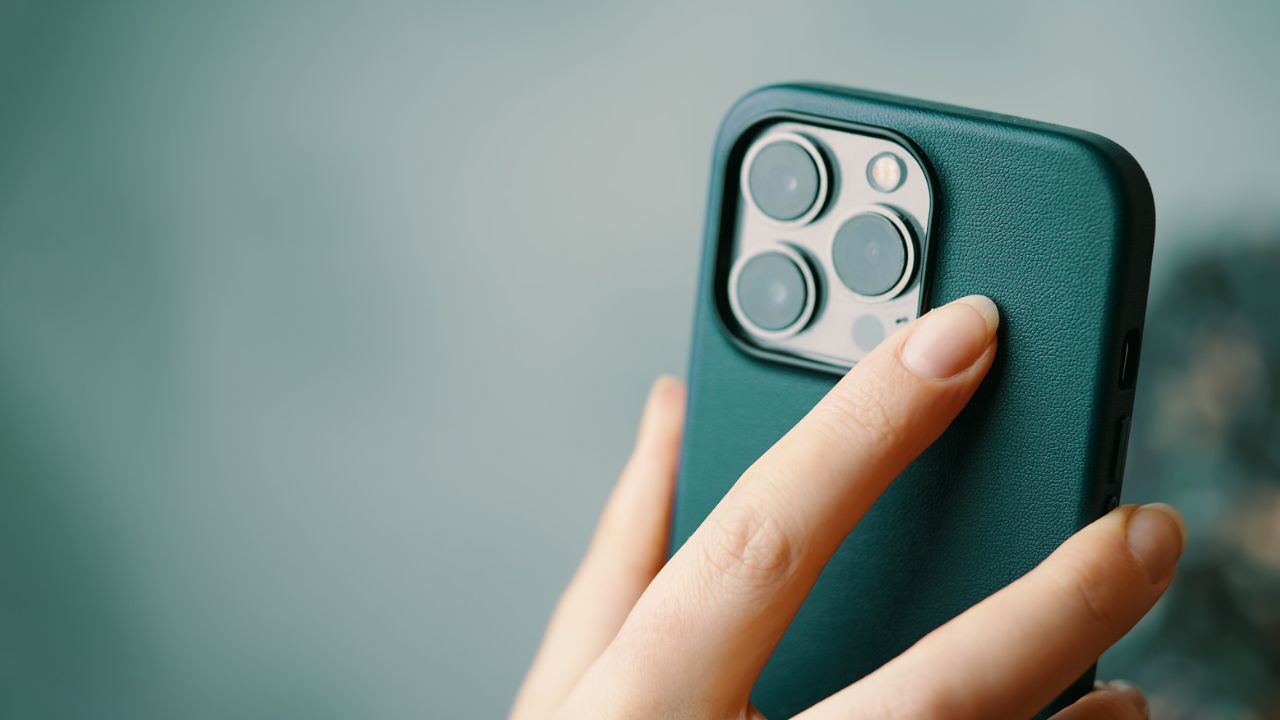
Begin by ensuring that your iPhone model is equipped to support eSIM functionality. Not all iPhones are eSIM-compatible, so it’s essential to verify this aspect beforehand. Check the specifications of your device here to guarantee a smooth transition.
2. Ensure a stable internet connection
A strong and consistent Wi-Fi connection is the backbone of successful eSIM transfer. Uninterrupted internet access is key in this process to avoid any interruptions or glitches. Before starting the transfer process, verify that your Wi-Fi connection is stable and reliable.
3. Confirm carrier or worldwide service provider support
The next step involves checking if your preferred network service provider supports eSIM services. Different carriers have varying levels of eSIM support, so it’s essential to confirm that your chosen carrier offers this feature. If you’re using esimwise’s eSIM, feel free to us via email at [email protected] if you have difficulties.
These meticulous preparations lay the foundation for a seamless and trouble-free transfer of your eSIM from Android to iPhone. Now, you’re ready to dive into the eSIM transfer process with confidence.
Transfer eSIM card from Android to iPhone by carrier’s app
This method involves using a carrier’s app to facilitate the eSIM transfer. The steps may vary depending on the app and carrier, but here is a general guide:
Step 1: Set up your new iPhone 14
Begin the process by powering on your new iPhone 14. Swipe through the Welcome screen to initiate the setup wizard.
Step 2: Continue with the setup process
Follow the on-screen prompts until you reach the “Set up cellular” screen. This is an important step in configuring your mobile network settings.
Step 3: Choose the “Set up Later” option
At the “Set up cellular” screen, opt for the “Set up Later” option. This allows you to delay the eSIM setup until a later stage in the overall iPhone configuration.
Step 4: Complete the iPhone setup
Proceed to complete the remaining steps of the iPhone setup. This involves configuring preferences, signing in to your Apple ID, and customizing settings according to your preferences.
Step 5: Download the app provided by your carrier
Visit the App Store and download the application provided by your mobile carrier. This app will facilitate the seamless transfer of your eSIM from your Android device to your new iPhone.
Step 6: Follow the on-screen instructions within the app
Launch the carrier-provided app and follow the on-screen instructions meticulously. The app will guide you through the specific steps needed to transfer your eSIM smoothly. This usually involves scanning a QR code or entering an activation code to initiate the transfer process.
Transfer an eSIM through the use of eSIM carrier activation
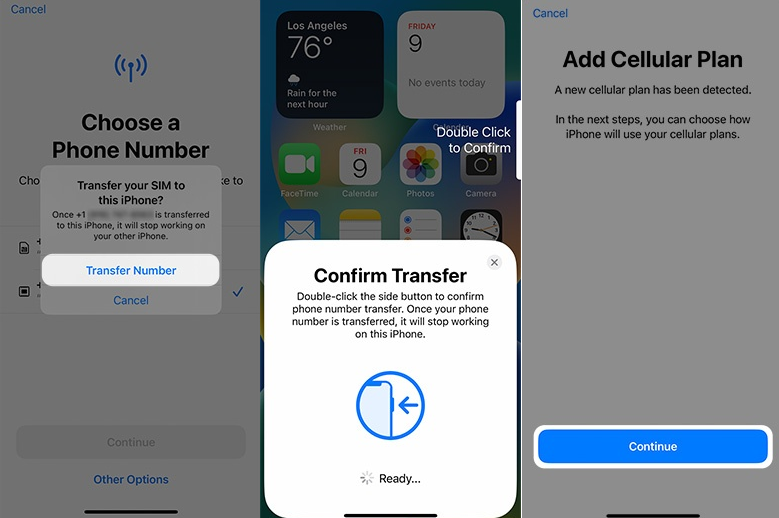
In this way, opting for a carrier that supports eSIM Carrier Activation is essential. With this feature, your device is pre-assigned to the carrier’s network based on its IMEI, streamlining the eSIM support configuration.
Then you need to follow these steps (this is specific to the iPhone 14 in the US).
Step 1: Welcome screen
Swipe through the Welcome screen as you power on your new iPhone 14. This initial step initiates the setup process.
Step 2: Wi-Fi connection and setup
Connect to your Wi-Fi network and proceed to complete the overall setup of your new device. This includes configuring preferences, signing in to your Apple ID, and customizing settings.
Step 3: Activation process
Allow the activation process to finish. This crucial step ensures that your iPhone is successfully recognized and authenticated on the network.
Step 4: Choose a cellular plan
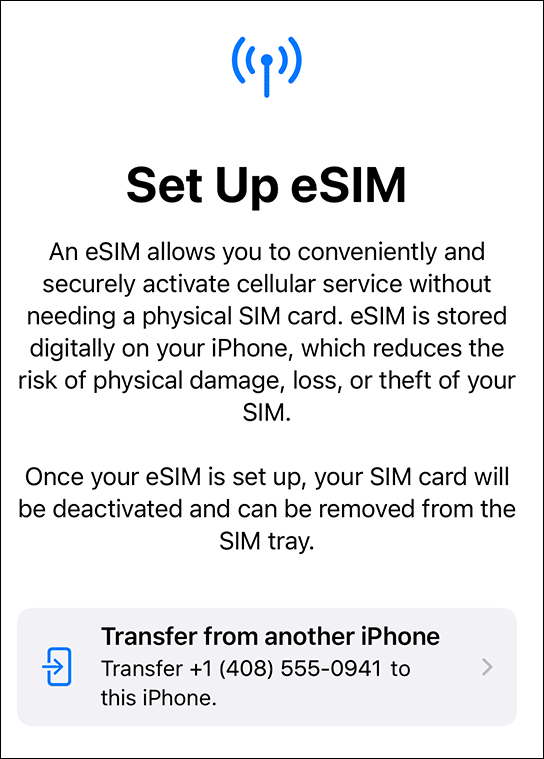
When prompted on the “Choose a Cellular Plan” screen, select your desired eSIM plan. This is where you link your device to the specific cellular plan you wish to activate.
Step 5: Press “Continue”
Press the “Continue” button to proceed with the selected eSIM plan. This action confirms your choice and advances you further into the setup process.
Step 6: Cellular setup completion
Once the message “Cellular setup complete” appears, choose “Continue” to finalize the setup. This signifies the successful activation of your eSIM, and you’re now ready to fully utilize your new iPhone 14.
After completing these steps, finalize the iPhone setup to start using it with the newly activated eSIM.
Transfer eSIM from Android to iPhone using a QR code
This method involves the use of a QR code to transfer the eSIM, contingent on carrier support for this feature. If supported, the carrier provides the QR code, simplifying the eSIM setup process. Follow these steps:
Step 1: Welcome screen
Navigate through the Welcome screen as you power on your new iPhone 14, initiating the setup process.
Step 2: Continue setup
Continue with the setup process by following on-screen instructions, which may involve configuring preferences, signing in to your Apple ID, and customizing settings.
Step 3: “Set up cellular” screen
When you reach the “Set up cellular” screen, opt for the “Use QR Code” option. This step is crucial for initiating the eSIM activation process.
Step 4: Scan QR code
Use your phone’s camera to scan the QR code provided by your carrier. This code contains essential information for activating your eSIM.
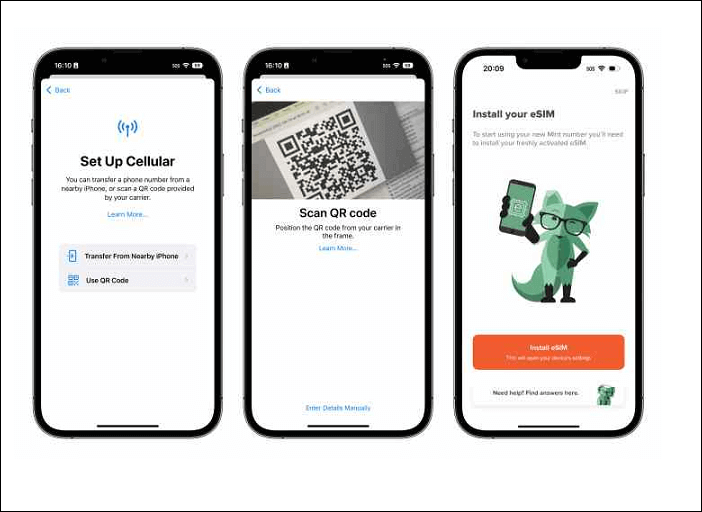
Step 5: Manual entry (if needed)
If scanning isn’t successful, manually enter the activation codes provided by your carrier. This ensures an alternative method for activating your eSIM.
Step 6: Allow activation process
Allow the eSIM activation process to complete. This step may take a moment as your device establishes a connection with the chosen cellular plan.
Step 7: Cellular setup complete
Once the message “Cellular setup complete” appears, press “Continue.” This confirms the successful activation of your eSIM, and you’re now ready to enjoy the full functionality of your new iPhone 14 with the activated eSIM.
FAQs
1. Can you transfer information from an Android to an iPhone?
For a simple transfer from Android to iPhone, use the Move to iOS app, available on the Google Play Store. This wireless method eliminates the need for cables, allowing you to transfer data seamlessly. It’s important to note that this transfer method is only applicable before setting up your iPhone.
2. How do I transfer eSIM from Android to a new phone?
Transfer your eSIM from Android to your new phone by deactivating it on the old device, getting the activation information or QR code from your carrier, and activating the eSIM on the new phone. This assures a seamless transition between devices.
3. How do I get an eSIM QR code for transferring?
To get an eSIM QR code for transferring, contact your mobile carrier’s customer support or visit their online portal. Request eSIM activation, and they will provide you with the QR code or activation details. Use the information provided during eSIM activation on your new device.
Wrap up
How to transfer eSIM from Android to iPhone opens the door to a connected world without the hassle of an eSIM card. Enjoy the flexibility, convenience, and environmental benefits of eSIM technology when you start your mobile journey with a new device.
Make the most of your eSIM capabilities and help your connectivity journey continue with ease across different devices. Welcome to a world where staying connected is as simple as a few taps on your smartphone!


