eSIM vs SIM: Is eSIM better than physical SIM?

eSIM vs physical SIM

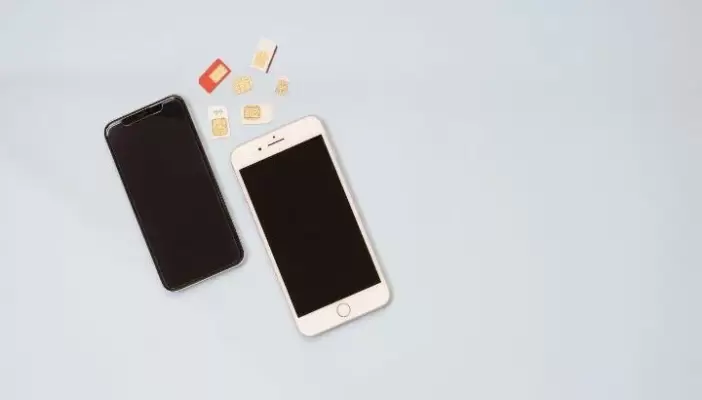
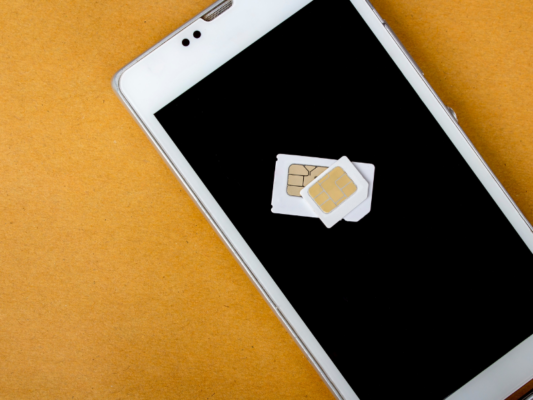
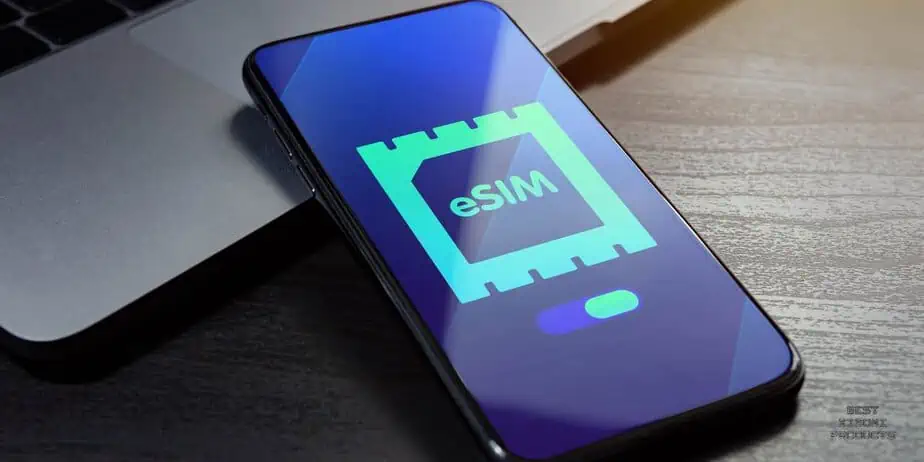
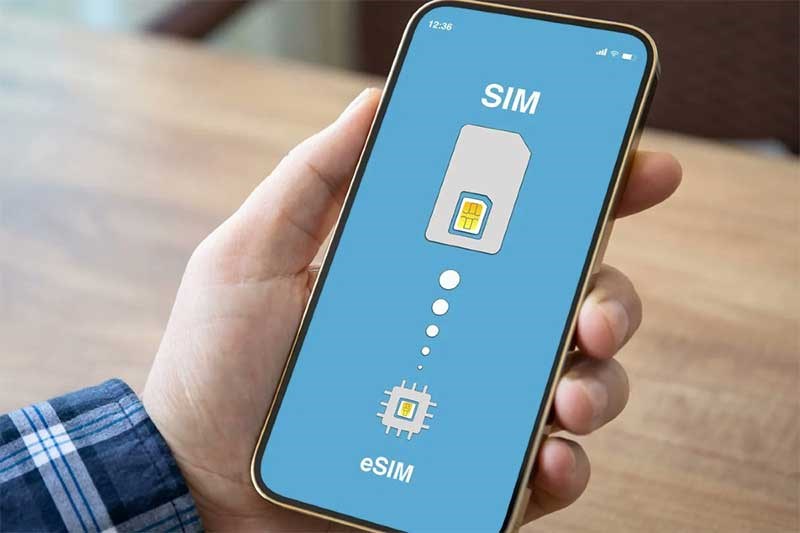
Is eSIM better than physical SIM? Both of them have many advantages and disadvantages. In short, an eSIM is a tiny chip that enables network connectivity through your carrier. While physical SIM cards have been very common for years with multiple sizes.

Although physical SIM cards are still the most often used kind, eSIM is a more practical option that is quickly rising in popularity.

In this article, we take a look at eSIM and physical SIM to explain the similarities, and differences and which is better for you.

eSIM vs physical SIM: The similarities
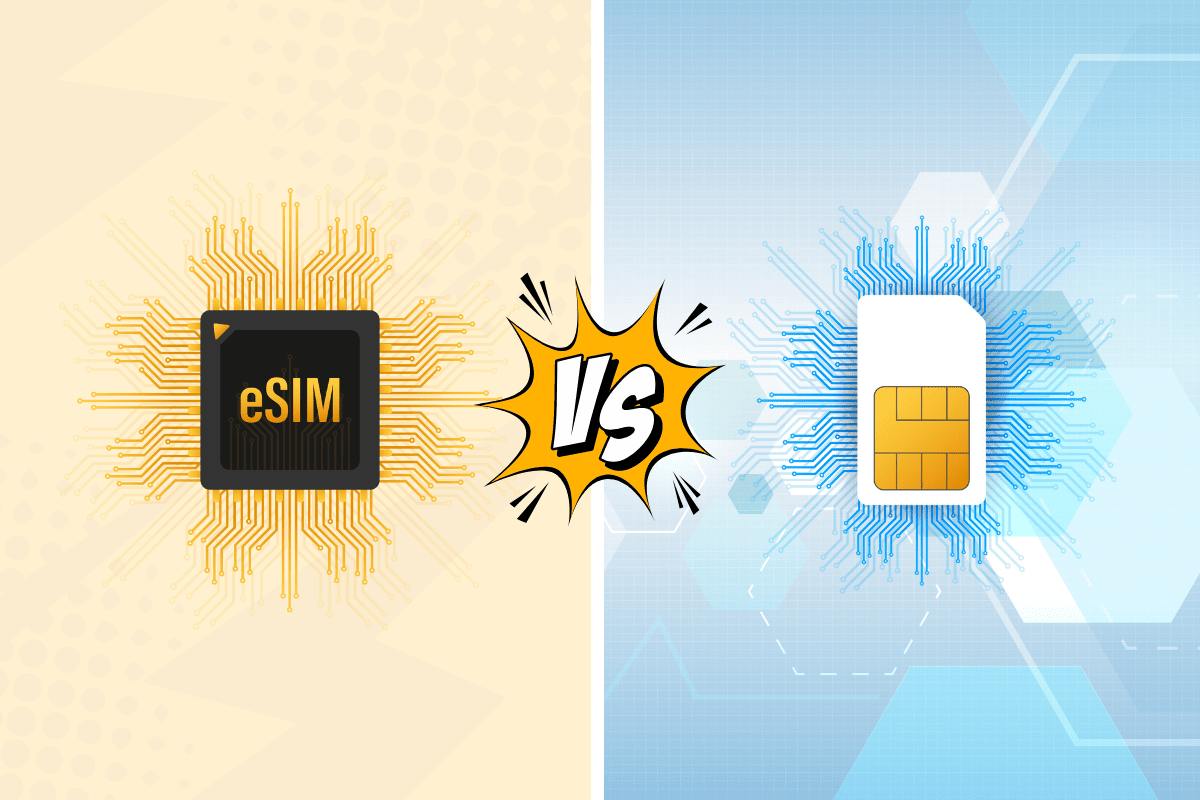
eSIM vs physical SIM
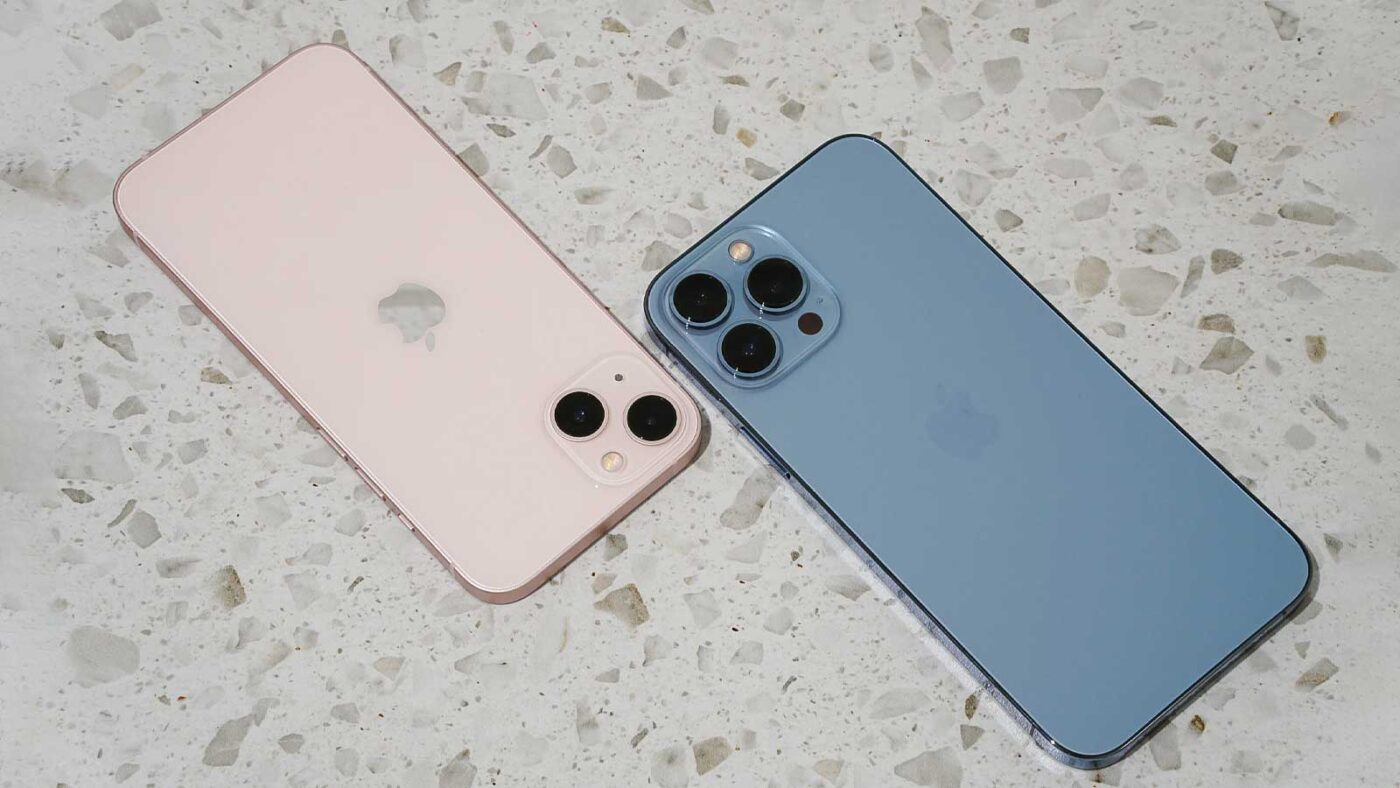
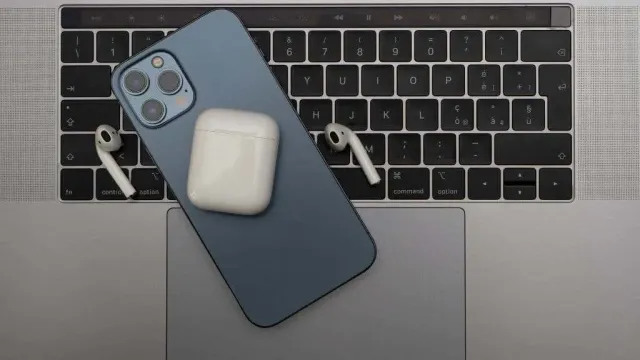
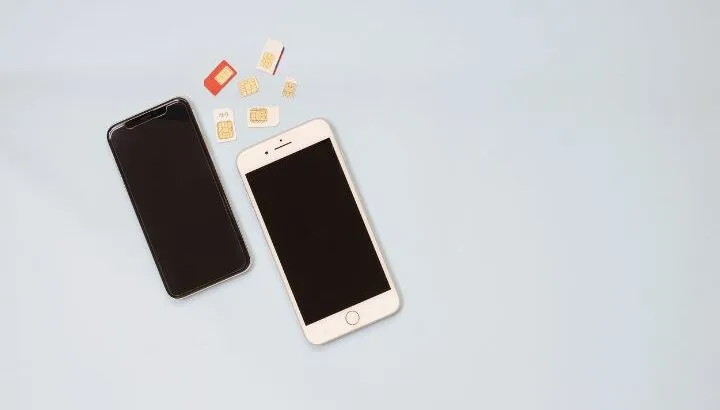
eSIM vs physical SIM – which one is better?. Image Credit: Techcult

eSIM vs physical SIM: The differences

Aside from the many similarities, there are a few key differences between eSIM and physical SIM that may make a difference when choosing which one to use. Among these differences are the following:

Technology

eSIM or embedded SIM is a technology that allows the device to be programmed via software. On the other hand, a physical SIM card is typically found inside a mobile device by securely installing the electronic components.

Form factor

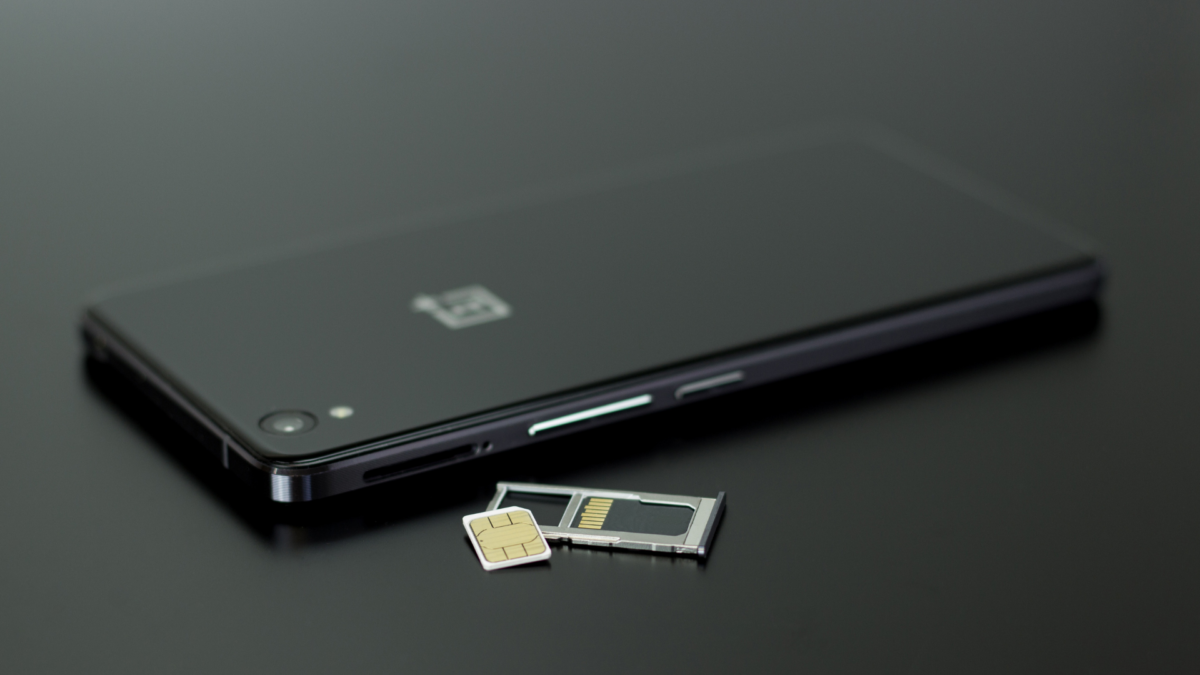
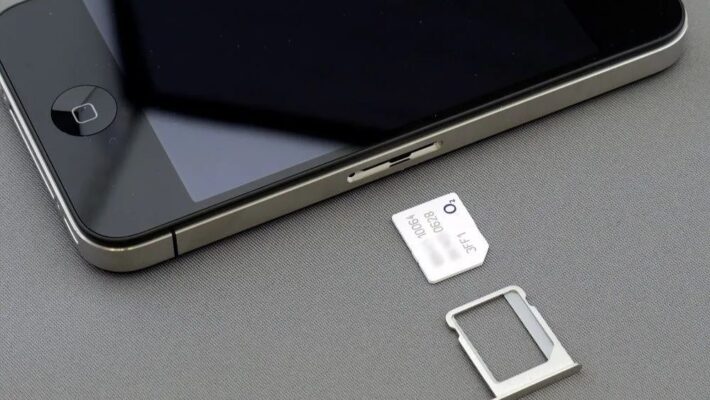
Physical SIM cards are rectangular tiny plastic cards that fit into the SIM card slot of a mobile device. On the other hand, eSIMs do not require a card slot because they fit right into the hardware of the device.

Storage capacity

Most physical SIM cards can hold between 8KB and 256KB of user data, including text messages and contacts. While eSIMs have more storage space, they can hold more user data.

Process of activation

To start the activation process using a physical SIM card, you must manually put the card into your device. However, the eSIM activation process is fully software-based and it is done remotely by the mobile network provider.

Convenience

With eSIM, you don’t need to go to a SIM card provider’s store to pick up a physical one and wait to get it. One thing you need to do is sign up for a mobile plan and activate eSIM immediately by using the provider’s app.

Price

Your mobile provider will typically give physical SIM cards for free or at a small cost. You are not charged for physical card plates or delivery costs because eSIMs are already embedded into the device.

Devices’ support

Most of the devices launched before the last five years do not support eSIM. Here is the list of mobile devices below that are currently accepted for eSIM.

Is eSIM better than physical SIM?
Is eSIM better than physical SIM?
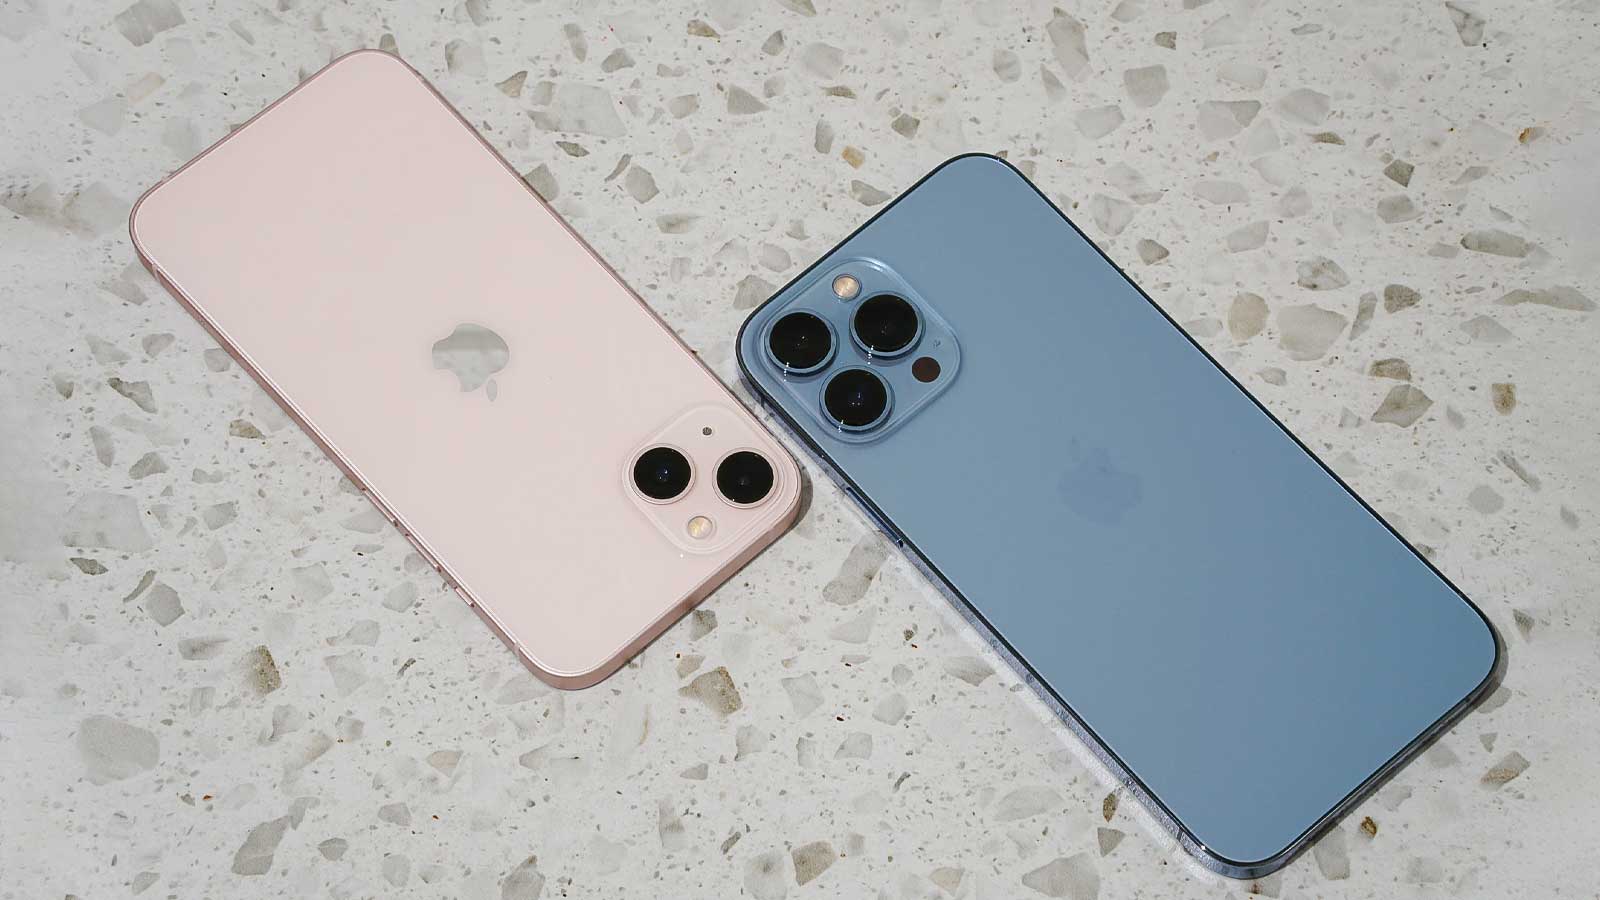
Is eSIM better than physical SIM? Image Credit: Whistleout

The pros and cons of eSIMs vs physical SIMs are easy to see when comparing the advantages and disadvantages of each technology. Is eSIM better than physical SIM? Some advantages that make eSIM a better alternative include the following:

Simple carrier switching

You may easily switch between up to 8 profiles that you can set up using eSIM. So, you don’t need to take out the SIM card or redo the length activation process, if you are not satisfied with the services or Internet speeds offered by one provider.

Safety

When discuss about safety, it makes perfect sense to choose eSIM technology if security is your top priority when it comes to mobile connectivity. Since eSIMs offer more secure encryption than physical SIM cards, eSIMs are less at risk of hacking or cloning. 

With the use of an advanced encryption protocol eSIM technology protects user data from unauthorized access, therefore safeguarding you against scam activities like identity theft and data breaches.

Friendly with the environment

The low impact of eSIM technology is another important advantage. Because eSIMs reduce the need for physical SIM cards, they are a more environmentally friendly choice for mobile communication.

When people upgrade their mobile devices or switch providers, they usually discard the materials used to make physical SIM cards, which include metal and plastic.

By avoiding the manufacture and disposal of these materials, users of eSIMs can help in the reduction of carbon footprints and environmental conservation.

Better user experience

Users can enjoy a smoother mobile device experience by reducing the need for physical SIM cards and paperwork and simplifying the activation process by using eSIM technology. 

eSIMs simplify setup and reduce the inconvenience of handling physical SIM cards by enabling users to activate their devices and connect to the provider’s network with a few taps on their screens.

eSIM is the future

A great deal of recently launched devices, such as tablets, smartwatches, and smartphones, enable eSIM. In a few locations, major OEMs like Apple have completely removed the option for a physical SIM card on some of their mobile devices.

For example, physical SIM cards are no longer supported by the iPhone 14 models sold in the United States. To explain this action, Apple’s VP of iPhone marketing said:

“With eSIM you can quickly transfer an existing cellular plan or get a new cellular plan, all digitally,” – Kaiann Drance responded in the event obtained by CNN Business.
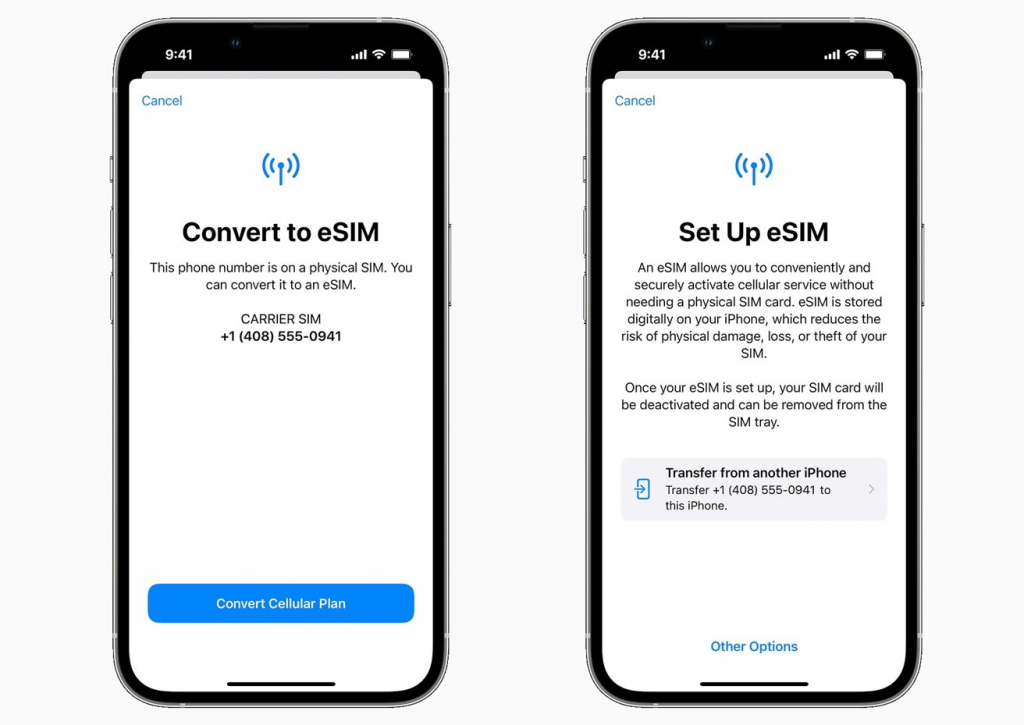
Apple changes physical SIM to eSIM in the future iPhone models. Credit Image: Apple

Recommendation: How to convert a physical SIM to eSIM?

FAQs

1. Does eSIM have a better signal?

No, whether a mobile device is using eSIM or a physical SIM card, the strength of the signal is mostly determined by coverage of the cellular network and the hardware of the device, including its radio capabilities and antenna. 

Because they are connected to the same cellular networks, eSIM and physical SIM cards do not inherently have different signal strengths.

2. Does eSIM drain the battery?

No, the mobile device’s battery does not get drained by the eSIM itself. If you use cellular data, it uses the same amount as a physical SIM card.

On the other hand, connecting to networks uses more energy of battery than being connected to only one.

3. Why is eSIM not popular?

Because eSIMs are only compatible with a small selection of devices. This is the main reason for their lack of popularity. Though the quantity of eSIM-compatible devices is increasing, it remains limited in comparison to physical SIM card-compatible devices.

Look in reality, Apple’s latest iPhone models no longer include a physical slot for a physical SIM card. Now, most people are still using the old version of the iPhone, instead of the latest models. However, the life cycle of an iPhone may end after a few years, people might change to the new generation of iPhone soon. With the number of iPhone users being 1.36 billion people in 2023 in the report of BankMyCell, this number will rise to 7.49 billion in 2025.

Wrap up

In conclusion, the answer to the question “Is eSIM better than physical SIM depends on personal preferences. eSIM offers remote activation and management, ideal for frequent travelers. Traditional SIM cards appeal to those who value familiarity. Ultimately, the choice between eSIM and physical SIM boils down to personal preferences and the specific requirements of the user. 

We’d love to hear your thoughts! Feel free to comment below and share your preferences or experiences with eSIM or physical SIM cards. Don’t forget to like and share if you found this information helpful.

How to use eSIM when traveling?

Getting ready for an upcoming trip? Stay connected easily with the wonders of eSIM technology! In this guide, we’ll navigate the simple steps on how to use eSIM when traveling. Say goodbye to the hassle of physical SIM cards. Join us as we explore the convenient world of eSIMs, ensuring you stay in touch no matter where your adventures take you.

Should travelers use eSIM?

At first glance, eSIM seems like a traveler’s dream, providing seamless connectivity with just a few taps when arriving in a new country. Wondering how to use eSIM when traveling? This technology promises convenience and numerous benefits. Let’s dive into its advantages and explore why it’s worth the hype.

how to use esim when traveling
eSIM is a practical choice for international travelers. Image Credit: Canvas

Convenience and ease of use

In terms of convenience, eSIMs excel, simplifying the process of joining the network. Purchasing a plan, following authentication steps, and selecting a payment method can all be done from your device, eliminating the need to visit a physical store. This is a game changer for frequent travelers and homebodies as it streamlines the travel experience.

Versatility for travelers

For constant travelers or individuals who frequently move between countries, eSIM offers the flexibility of maintaining multiple profiles. Business travelers and expats can easily switch between profiles without the risk of losing their physical SIM card.

Space-saving and waterproofing

Beyond convenience, switching from physical SIM to eSIM also brings practical benefits. It frees up space inside the device for additional features, extends battery life, and contributes to a more compact hardware design. Furthermore, the reduced number of slots aids in waterproofing, creating a more durable device.

Considerations for widespread adoption

Despite these advantages, the full potential of eSIMs relies on widespread carrier support, including prepaid options. Currently, their effectiveness depends on geographical location, limiting their global reliability.

Guide to use eSIM when traveling

Using an eSIM for vacation data is cost-effective and eliminates roaming fees. If it’s your first time, the process might seem overwhelming. Here’s a step-by-step guide on how to use eSIM when traveling: purchase a prepaid eSIM, set it up on your phone, and understand the necessary steps upon arriving at your destination to ensure a smooth international data connection.

Choose a reputable eSIM provider based on your destination. Image Credit: Canvas

Before you start your vacation

  1. Confirm eSIM compatibility: Check your phone’s compatibility.
  2. Select a destination-specific eSIM: Explore our wide range of eSIM cards for over 150 countries on Esimwise. Choose the prepaid travel data package that suits your destination.
  3. Install the eSIM: Despite being a virtual SIM, the process is simple and only takes a few minutes over a stable internet connection.

Now that your eSIM is set up, you can focus on packing for your vacation without worrying about your phone. We’ll catch up with you just before you begin on your journey. 

When you’re about to leave the country

Welcome to the beginning of your fantastic vacation! Now that you’ve installed your travel eSIM card, there are just a few more steps to ensure a smooth journey, especially when using eSIM while traveling:

Option 1: Use your phone number while traveling

If you want to use your phone number while traveling with an eSIM for data, a little prep is needed. Your phone should be aware that it’s using an eSIM and not attempting to rely on your home data plan once you cross borders. This is crucial to avoid those pesky roaming fees.

For iPhone or iPad users with eSIM:

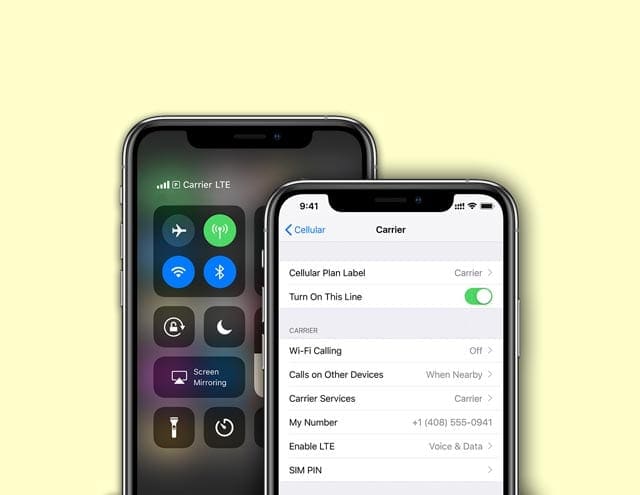
  1. Navigate to Settings > Cellular > Cellular Plans.
  2. Select your Primary data plan.
  3. Ensure that “Data Roaming” is turned OFF.

For Google Pixel users with eSIM:

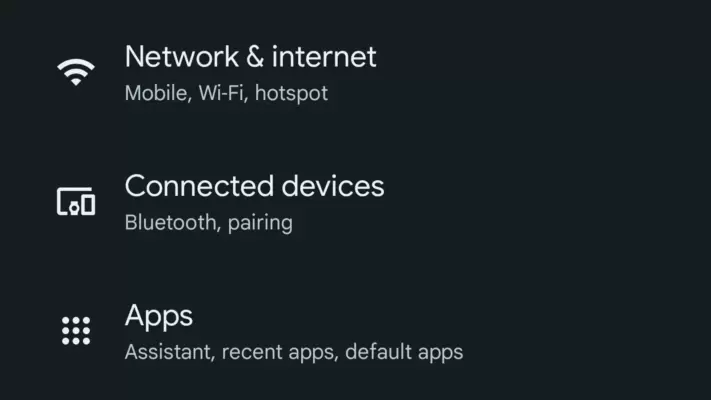
  1. Head to Settings > Network & Internet > Mobile networks.
  2. Choose your Primary SIM.
  3. Toggle “Mobile data” and “Roaming” to OFF.

For Samsung device users with eSIM:

  1. Go to Settings > Connections > Mobile Networks.
  2. Turn Data Roaming OFF.

Further reading: How to get an eSIM with a  phone number?

Option 2: Don’t want to use your phone number while traveling

If you prefer not to incur charges for calls and texts while traveling internationally, disable your primary SIM card. It prevents all incoming and outgoing calls and texts. This makes sure that you won’t be billed for any communication fees during your vacation until you re-enable it. This is a handy guide on how to use eSIM when traveling.

For iPhone or iPad eSIM users:

  1. Navigate to Settings > Cellular > Cellular Plans.
  2. Select your Primary data plan.
  3. Toggle “Turn On This Line” to OFF.

For Google Pixel eSIM users:

  1. Go to Settings > Network & Internet> Mobile networks.
  2. Choose your Primary SIM.
  3. Set “Use SIM” to OFF.

For Samsung eSIM users:

  1. Access Settings > Connections > SIM Card manager.
  2. Toggle your Primary SIM OFF.

If you don’t mind being charged for active calls and texts during your vacation, you can skip this step. Simply be aware that your carrier will add these charges to your next bill. Now, you can switch your phone to Airplane Mode and enjoy a hassle-free trip.

Upon reaching your destination

1. Switch off airplane mode:

If you fly, turn off Airplane Mode to enable the new eSIM for data. You have disabled Data Roaming on your primary SIM to avoid roaming charges.

2. Activate your eSIM data package:

In the correct country/region, activate your purchased eSIM data package by following our guide on how to activate eSIM.

3. Confirm eSIM usage for data:

  • On iPhone/iPad: Go to Settings > Cellular > Cellular Data and ensure your eSIM is selected.
  • On Google Pixel: Navigate to “Settings” > “Network & Internet” > “Mobile networks.” Turn off Mobile data and Roaming for the Primary SIM, then toggle on your eSIM with Mobile data and Roaming ON.
  • On Samsung devices: Go to “Settings” > “Connections” > “SIM Card manager” and select your eSIM as the Preferred SIM.

4. Enjoy your new eSIM data:

While Wi-Fi is an option, your eSIM provides a reliable data connection at your hotel or on the go. Use it wherever needed, check your remaining data balance, and top up your eSIM if necessary.

Advice for using eSIM when traveling

For digital nomads and avid travelers, knowing how to use eSIM when traveling is essential, eliminating the hassle of switching physical SIM cards. Here’s how to maximize the benefits of eSIM when traveling:

Ensure your device is compatible and select an eSIM plan that suits your travel needs. Image Credit: Canvas

Device compatibility

Confirm that your device, such as iPhones from XS onward and select Android models, supports eSIM functionality to enable dual SIM capability. This ensures you can seamlessly integrate the eSIM with your device for optimal performance.

Pre-purchase eSIM plan

Streamline your travel experience by researching and purchasing an eSIM plan from a reputable provider that caters to your destination countries. This proactive step not only saves valuable time upon arrival but can also be cost-effective compared to the traditional hassle of obtaining physical SIM cards.

Activate your eSIM as soon as you arrive

Maximize your connectivity by activating the eSIM as soon as you arrive at your destination. This proactive approach mitigates potential issues related to network settings or compatibility, ensuring a smooth transition into your travel experience.

Regional vs. individual country plans

Tailor your eSIM plan selection to your travel itinerary. Opt for a regional plan if your journey spans multiple countries within a specific region, providing convenient coverage across borders. Conversely, individual country plans may offer better rates and coverage for more focused travel itineraries.

Be mindful of data usage

While eSIM offers great flexibility in switching plans, it’s important to exercise caution in data management. Be wary of your data usage and consider adding an additional eSIM to your plan if your travel needs allow.

Prepare for technical difficulties

Realize that, like any technological innovation, eSIM can sometimes encounter challenges. Be proactive by having a contingency plan in place, ready to address potential issues like device recognition issues or cases where the eSIM may not work smoothly in specific countries.

FAQs

1. Should I install eSIM before traveling?

Unlike the traditional approach of purchasing a local SIM at the airport upon arrival, acquiring an eSIM is a different process. It’s advisable to buy your eSIM before departure. Once purchased, you’ll need to install and activate it on your phone before it becomes operational. This proactive approach ensures a smoother transition and connectivity when you reach your destination.

2. Do you need data roaming for eSIM?

eSIM is designed specifically for travel, providing data access without the expensive roaming fees of local SIM cards. Unlike traditional SIMs, data roaming must be enabled for these cards to operate seamlessly, providing a cost-effective solution for staying connected while abroad.

3. When should I buy eSIM for travel?

Contrary to buying a local SIM upon arrival at the airport, it’s advisable to purchase an eSIM before your departure. This proactive step ensures a smoother process and connectivity when you reach your destination. 

One convenient option for acquiring an eSIM is through the Esimwise shop. By purchasing an eSIM in advance from Esimwise, you can enjoy the convenience of having connectivity immediately upon reaching your destination, without the need to buy a local SIM card upon arrival.

Wrap up

Using eSIM when traveling is a really great solution for travel enthusiasts around the world who value seamless connectivity. By following these simple steps on how to use eSIM when traveling, you can ensure that you stay connected wherever your adventures take you. Enjoy the future of travel and enjoy the freedom of being connected without the hassle of physical SIM cards. Safe trip!

How to transfer eSIM from one iPhone to another?

Have you ever wondered how to transfer eSIM from one iPhone to another without losing a byte of connectivity magic? Come along with us as we guide you through the steps, revealing the secrets to a perfect eSIM transfer.  Ready to make magic happen? Let’s dive into the fascinating world of eSIM migration.

Related posts:

Can I transfer eSIM from one iPhone to another?

It is usually possible to transfer an eSIM (embedded SIM) from one iPhone to another. This process may vary slightly depending on your mobile carrier and the specific iPhone models involved. Before making any changes, you should back up your data. You can use iCloud or iTunes to create a backup of your current iPhone.

Make sure both iPhones are on the same Wi-Fi network for a smooth data transfer. Image Credit: Businessinsider

Make sure that both iPhones are compatible with your mobile carrier’s eSIM service. Not all carriers support eSIM, and not all iPhone models have eSIM capabilities.  Once prepared, follow our guide on how to transfer eSIM from one iPhone to another in the next part.

How to transfer eSIM from one iPhone to another?

Here’s a step-by-step guide on how to transfer eSIM from one iPhone to another. By following these steps, you should be able to successfully transfer your eSIM. 

Transfer eSIM to new iPhone manually

Step 1: Navigate to settings

Unlock your iPhone and locate the “Settings” app on your home screen. Tap on it to open the Settings menu.

Step 2: Access mobile data

Once you’re in the Settings menu, scroll down until you find the option labeled “Mobile Data” or “Cellular.” Tap on it to access the mobile data settings.

Step 3: Set up mobile service

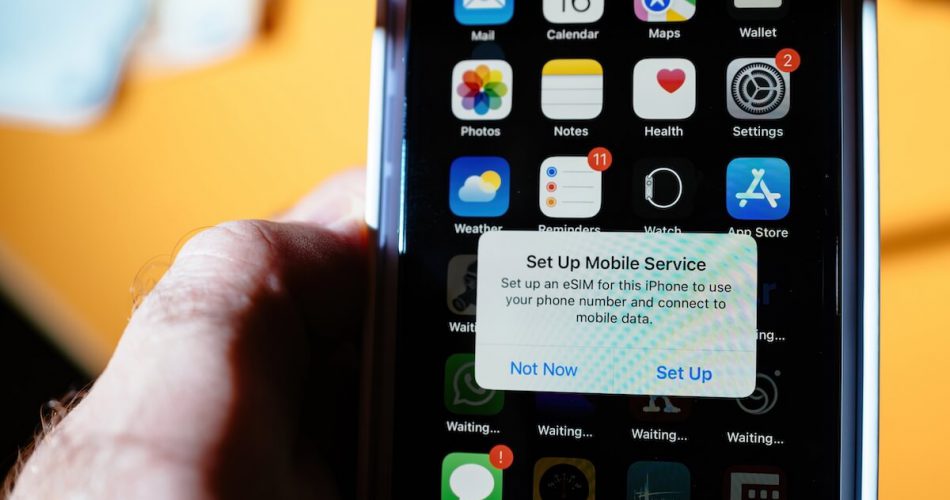
Within the Mobile Data settings, look for an option that says “Set up mobile service“. This option may vary slightly depending on your iOS version. Tap on it to proceed.

Step 4: View mobile numbers

After selecting “Set up mobile service,” you should see a list displaying all the mobile numbers associated with your old iPhone. This list includes both e-SIM and physical SIM card numbers.

Step 5: Check transfer support

Under each mobile number, check for information related to eSIM transfer support. If your telecom operator supports automatic eSIM transfer, you should see a message indicating that. However, if the transfer is not supported, you might see a message like ‘Transfer not supported‘ under your number.

Step 6: Contact your operator

If you find that eSIM transfer is not supported by your telecom operator, it’s time to contact them for assistance. Look for the customer support contact details, usually available on their official website or through the information provided with your mobile plan.

Step 7: Verification and confirmation

Follow the operator’s instructions, verify your details (e.g., email ID), and send the required text. You’ll receive a confirmation email indicating that your eSIM transfer is in progress.

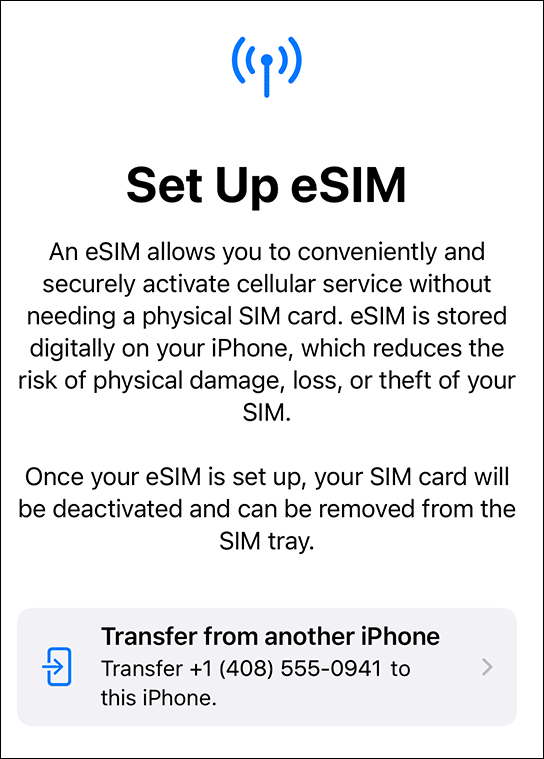
How to easily transfer eSIM from one iPhone to another. Credit Image: Macdentro

Transfer eSIM to new iPhone automatically

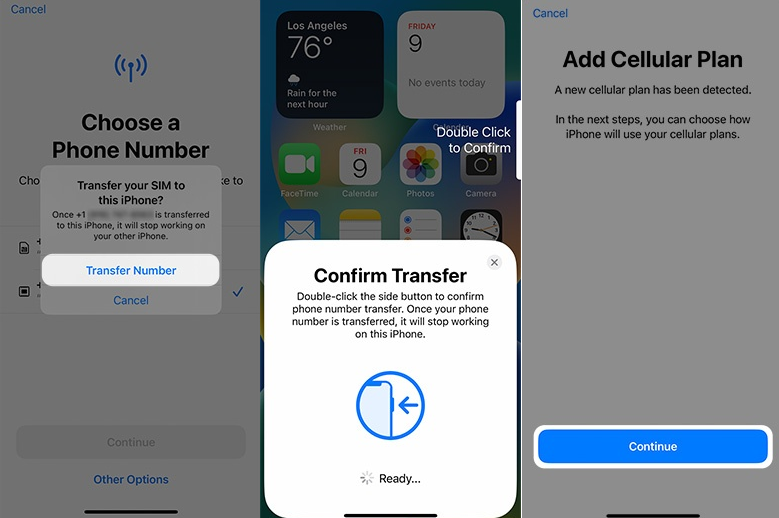
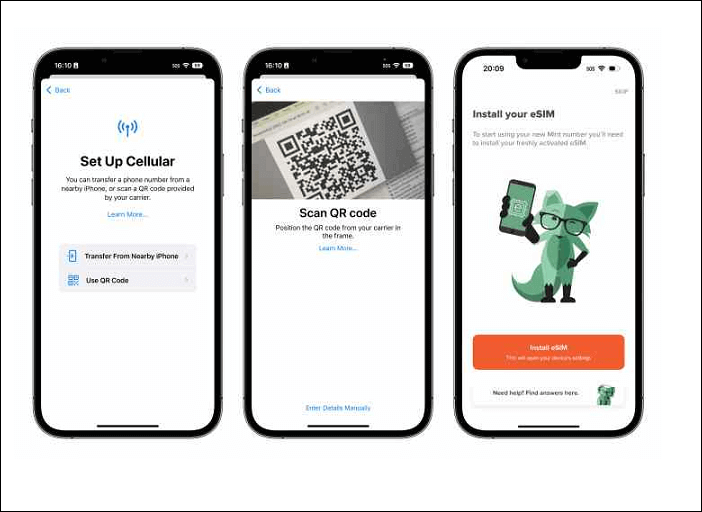
When switching to a new iPhone, transferring your eSIM can be easy with two convenient options: ‘Transfer from nearby iPhone‘ and ‘QR Code‘.

1. Access Settings

Go to Settings on your new iPhone, then navigate to Mobile Data, and select Set up mobile service.

2. Explore Other Options

Tap ‘Other options’ at the bottom of your screen to reveal the two transfer methods.

3. Transfer from Nearby iPhone

  • Opt for this method and receive a notification on your old iPhone.
  • Tap continue and input the verification code displayed on your new iPhone.
  • Once the process is complete, your eSIM seamlessly transfers to the new device.

4. QR Code Transfer

  • Choose the ‘QR code’ option.
  • Contact your telecom operator to obtain a QR code.
  • Use the camera app to scan the QR code.
  • When the ‘Cellular Plan Detected’ notification appears, tap it.
  • Continue at the bottom of the screen to add your data plan.

FAQs

1. How long to transfer eSIM from one iPhone to another?

The time it takes to transfer an eSIM from one iPhone to another may vary based on a number of factors, including the specific carrier, network conditions, and the efficiency of the activation process.  In general, the eSIM transfer process is designed to be relatively quick and usually only takes a few minutes.

2. Where is the QR code for eSIM transfer?

The QR code for eSIM transfer is often provided by your mobile carrier when you begin the process of transferring your eSIM from one iPhone to another. This code may be sent through email, text, or available on their app or website. Alternatively, you might receive it at a physical retail store or in an activation kit. Further reading: How to get an eSIM QRcode?

Wrap up

Congratulations, you’ve mastered the way to transfer eSIM from one iPhone to another! This simple process ensures a smooth transition between devices. By following these steps, you can easily transfer your eSIM, allowing you to stay connected without interruption on your new iPhone. Keep up with technology, upgrade your device and enjoy a streamlined mobile experience.

How to transfer eSIM from Android to iPhone?

Starting a new chapter with your iPhone? If you’re switching from Android and want to retain your existing eSIM data, fear not! In this post, we will guide you on how to transfer eSIM from Android to iPhone smoothly. Whether you’re upgrading your device or simply exploring the features of your new iPhone, understanding the eSIM transfer process is key to maintaining an uninterrupted connection. Let’s get started!

Related posts:

Can I transfer eSIM from Android to iPhone?

Yes, you can transfer eSIM from Android to iPhone. This process involves deactivating eSIM on your Android device and then activating eSIM on your iPhone. Ensure both devices support eSIM technology and contact your mobile carrier to receive the QR code necessary for activation on your new iPhone.

transfer esim from android to iphone
Always make sure to back up your data before transferring. Image Credit: Canvas

The testing function is also important; make a test call, send a text message, or use data to make sure your eSIM works smoothly on your iPhone. Once done, you will enjoy uninterrupted connectivity on your iPhone with the transferred eSIM.

Before transfering

To ensure your eSIM transfer from Android to iPhone goes smoothly, you need to prepare carefully. Have a look at some notes before transferring eSIM from Android to iPhone:

Prepare carefully to ensure a smooth eSIM transfer from Android to iPhone. Image Credit: Canvas

1. Check device compatibility

Begin by ensuring that your iPhone model is equipped to support eSIM functionality. Not all iPhones are eSIM-compatible, so it’s essential to verify this aspect beforehand. Check the specifications of your device here to guarantee a smooth transition.

2. Ensure a stable internet connection

A strong and consistent Wi-Fi connection is the backbone of successful eSIM transfer. Uninterrupted internet access is key in this process to avoid any interruptions or glitches. Before starting the transfer process, verify that your Wi-Fi connection is stable and reliable.

3. Confirm carrier or worldwide service provider support

The next step involves checking if your preferred network service provider supports eSIM services. Different carriers have varying levels of eSIM support, so it’s essential to confirm that your chosen carrier offers this feature. If you’re using esimwise’s eSIM, feel free to us via email at [email protected]  if you have difficulties.

These meticulous preparations lay the foundation for a seamless and trouble-free transfer of your eSIM from Android to iPhone. Now, you’re ready to dive into the eSIM transfer process with confidence.

Transfer eSIM card from Android to iPhone by carrier’s app

This method involves using a carrier’s app to facilitate the eSIM transfer. The steps may vary depending on the app and carrier, but here is a general guide:

Step 1: Set up your new iPhone 14

Begin the process by powering on your new iPhone 14. Swipe through the Welcome screen to initiate the setup wizard.

Step 2: Continue with the setup process

Follow the on-screen prompts until you reach the “Set up cellular” screen. This is an important step in configuring your mobile network settings.

Step 3: Choose the “Set up Later” option

At the “Set up cellular” screen, opt for the “Set up Later” option. This allows you to delay the eSIM setup until a later stage in the overall iPhone configuration.

Step 4: Complete the iPhone setup

Proceed to complete the remaining steps of the iPhone setup. This involves configuring preferences, signing in to your Apple ID, and customizing settings according to your preferences.

Step 5: Download the app provided by your carrier

Visit the App Store and download the application provided by your mobile carrier. This app will facilitate the seamless transfer of your eSIM from your Android device to your new iPhone.

Step 6: Follow the on-screen instructions within the app

Launch the carrier-provided app and follow the on-screen instructions meticulously. The app will guide you through the specific steps needed to transfer your eSIM smoothly. This usually involves scanning a QR code or entering an activation code to initiate the transfer process.

Steps to move an eSIM from iPhone to Android by carrier’s app. Image Credit: Mobikin

Transfer an eSIM through the use of eSIM carrier activation

In this way, opting for a carrier that supports eSIM Carrier Activation is essential. With this feature, your device is pre-assigned to the carrier’s network based on its IMEI, streamlining the eSIM support configuration.

Then you need to follow these steps (this is specific to the iPhone 14 in the US).

Step 1: Welcome screen

Swipe through the Welcome screen as you power on your new iPhone 14. This initial step initiates the setup process.

Step 2: Wi-Fi connection and setup

Connect to your Wi-Fi network and proceed to complete the overall setup of your new device. This includes configuring preferences, signing in to your Apple ID, and customizing settings.

Step 3: Activation process

Allow the activation process to finish. This crucial step ensures that your iPhone is successfully recognized and authenticated on the network.

Using eSIM carrier activation, activate an eSIM Image Credit: Mobikin

Step 4: Choose a cellular plan

When prompted on the “Choose a Cellular Plan” screen, select your desired eSIM plan. This is where you link your device to the specific cellular plan you wish to activate.

Step 5: Press “Continue”

Press the “Continue” button to proceed with the selected eSIM plan. This action confirms your choice and advances you further into the setup process.

Step 6: Cellular setup completion

Once the message “Cellular setup complete” appears, choose “Continue” to finalize the setup. This signifies the successful activation of your eSIM, and you’re now ready to fully utilize your new iPhone 14.

After completing these steps, finalize the iPhone setup to start using it with the newly activated eSIM. 

Transfer eSIM from Android to iPhone using a QR code

This method involves the use of a QR code to transfer the eSIM, contingent on carrier support for this feature. If supported, the carrier provides the QR code, simplifying the eSIM setup process. Follow these steps:

Step 1: Welcome screen

Navigate through the Welcome screen as you power on your new iPhone 14, initiating the setup process.

Step 2: Continue setup

Continue with the setup process by following on-screen instructions, which may involve configuring preferences, signing in to your Apple ID, and customizing settings.

Step 3: “Set up cellular” screen

When you reach the “Set up cellular” screen, opt for the “Use QR Code” option. This step is crucial for initiating the eSIM activation process.

Step 4: Scan QR code

Use your phone’s camera to scan the QR code provided by your carrier. This code contains essential information for activating your eSIM.

Using a QR code, transfer eSIM from Android to iPhone Image Credit: Mobikin

Step 5: Manual entry (if needed)

If scanning isn’t successful, manually enter the activation codes provided by your carrier. This ensures an alternative method for activating your eSIM.

Step 6: Allow activation process

Allow the eSIM activation process to complete. This step may take a moment as your device establishes a connection with the chosen cellular plan.

Step 7: Cellular setup complete

Once the message “Cellular setup complete” appears, press “Continue.” This confirms the successful activation of your eSIM, and you’re now ready to enjoy the full functionality of your new iPhone 14 with the activated eSIM.

FAQs

1. Can you transfer information from an Android to an iPhone?

For a simple transfer from Android to iPhone, use the Move to iOS app, available on the Google Play Store. This wireless method eliminates the need for cables, allowing you to transfer data seamlessly. It’s important to note that this transfer method is only applicable before setting up your iPhone.

2. How do I transfer eSIM from Android to a new phone?

Transfer your eSIM from Android to your new phone by deactivating it on the old device, getting the activation information or QR code from your carrier, and activating the eSIM on the new phone. This assures a seamless transition between devices.

3. How do I get an eSIM QR code for transferring?

To get an eSIM QR code for transferring, contact your mobile carrier’s customer support or visit their online portal. Request eSIM activation, and they will provide you with the QR code or activation details. Use the information provided during eSIM activation on your new device.

Wrap up

How to transfer eSIM from Android to iPhone opens the door to a connected world without the hassle of an eSIM card. Enjoy the flexibility, convenience, and environmental benefits of eSIM technology when you start your mobile journey with a new device.

Make the most of your eSIM capabilities and help your connectivity journey continue with ease across different devices. Welcome to a world where staying connected is as simple as a few taps on your smartphone!

How to move eSIM from one phone to another?

move esim from one phone to another

As technology advances, staying connected is more crucial than ever. With the advent of eSIM technology, the process of switching phones has become more streamlined, eliminating the need for physical SIM cards. If you’re wondering how to move eSIM from one phone to another seamlessly, you’ve come to the right place. In this comprehensive guide, we’ll walk you through the step-by-step process to ensure a smooth transition.

Related posts:

Can I transfer eSIM from one phone to another?

Yes, you can transfer an eSIM from one phone to another. The process may vary slightly depending on the devices and mobile service providers involved, but before starting to move eSIM from one phone to another, keep in mind some notes:

  • Check compatibility: Before initiating the transfer process, confirm that both your old and new phones support eSIM functionality here. While most modern smartphones offer eSIM support, it’s advisable to verify this compatibility to ensure a smooth transition.
  • Backup your data: Prioritize the protection of your valuable data by creating a backup on your old phone. This precautionary step prevents the risk of data loss during the transfer, encompassing crucial elements like contacts, photos, messages, and other essential information.
move esim from one phone to another
Follow carrier and phone model instructions for transferring eSIM to new phone. Image Credit: Canvas

How to move eSIM from one phone to another

Moving an eSIM from one phone to another involves a few key steps to ensure a smooth transition. By following these steps, you can successfully move eSIM from one phone to another, maintaining uninterrupted connectivity on your new device.

Switching an eSIM between phones requires key steps for a smooth transition. Image Credit: Canvas

Step 1: Check compatibility

Start by checking the eSIM compatibility of both your old and new phones. Although most modern smartphones support eSIM, it’s prudent to double-check this feature to avoid any unforeseen issues during the transfer process.

Step 2: Back-up data

Minimize the risk of data loss by performing a comprehensive backup of important information from your old phone. This includes contacts, photos, messages, and any other data you consider necessary. This precaution ensures a smooth transition without sacrificing important content.

Step 3: Deactivate eSIM on old phone

Head to the settings on your old phone and locate the eSIM section. Within this menu, select the option to deactivate the eSIM. This step is critical as it releases the eSIM from your old device, making it available for seamless transfer.

Step 4: Obtain QR code or activation details

Contact your new carrier or service provider to get the tools needed for eSIM migration. Usually, they will provide you with a QR code or activation details. This information is important to start eSIM activation on your new device.

Step 5: Activate eSIM on the new phone

Access the eSIM settings on your new phone and choose the ‘Add new eSIM’ option. Follow the on-screen prompts to input the QR code or activation details provided by your carrier. This step ensures a secure and accurate activation process. For the details: How to activate your eSIM?

Step 6: Test and confirm

After successfully activating the eSIM on your new device, conduct thorough tests to verify the functionality of calls, messages, and data services. This testing phase is key to confirming the seamless transfer and addressing any potential issues promptly.

Related post: eSIM transfer not working: How to solve?

FAQs

1. How do I use the same eSIM on two phones?

It’s not possible to use the same eSIM on two phones simultaneously, as each eSIM is device-specific and tied to a unique mobile number. Even if a device supports multiple eSIMs, you can’t share the same mobile number across different phones using eSIMs. Activating the eSIM on a second device will deactivate it on the first one. For the same number on multiple devices, explore alternatives like call forwarding or data syncing.

2. How long does it take to transfer eSIM to another phone?

The time it takes to move eSIM from one phone to another may vary based on a number of factors, including your mobile carrier’s specific processes, the efficiency of their system, and the type of device involved. In general, the process is relatively quick and can often be completed within a few minutes. However, some service providers may take longer to process the transfer.

3. Where is the QR code for eSIM transfer?

To obtain your eSIM QR code, simply visit your carrier’s official website. Look for the eSIM activation or management section, where you’ll find the tools and information needed to generate your unique QR code for the eSIM transfer process.

Wrap up

How to move eSIM from one phone to another doesn’t have to be a complicated process. By following these simple steps, you can seamlessly transfer your eSIM, ensuring uninterrupted connectivity on your new device. Stay connected easily with the power of eSIM technology. If you encounter any difficulties during the process, don’t hesitate to reach out to your mobile service provider for personalized assistance.

How to convert a physical SIM to an eSIM?

Opening up a world of fast connectivity has never been more exciting than with the revolutionary shift from a physical SIM to an eSIM. If you’ve ever wondered about “how to convert physical SIM to eSIM”, you’re in for a treat. This transformation is not just about upgrading technology; it’s the gateway to a future where your mobile experience is freed from traditional constraints. Are you ready to take the leap? Let’s explore the magic!

What does convert to eSIM mean? 

When you convert to eSIM, the process essentially involves moving all the information stored on your physical SIM card to the eSIM chip. For example, if you decide to switch to a new phone equipped with an eSIM instead of a traditional SIM card slot, you can seamlessly retain your current phone plan.

Transitioning to eSIM involves moving from a physical to a digital SIM card. Image Credit: Simify

This transition ensures continuity in your service, eliminating the need to purchase a new plan or go through the hassle of migrating your subscription. It’s a smooth and convenient way to take advantage of eSIM technology while maintaining your existing cellular arrangements.

Should I convert to eSIM?

Is converting to eSIM the right choice for you?  Opting for eSIM brings various benefits, such as saving physical space on your device, enabling dual SIM functionality, and allowing remote management of your cellular plans. By eliminating the need for a physical SIM card, your device will have more space for additional features.

The added convenience of remotely activating and monitoring your mobile plans enhances flexibility. However, it’s important to confirm that both your device and carrier support eSIM before making the switch to ensure a seamless and efficient mobile experience.

Further reading: Is eSIM better than physical SIM?

How to convert a physical SIM to an eSIM?

You can convert SIM to eSIM, but the process may vary depending on your mobile carrier and the capabilities of your device. Here’s a concise guide on how to convert a physical SIM to an eSIM on both iPhone and Android:

How to transfer SIM to eSIM on iPhone

Step 1. Confirm device compatibility

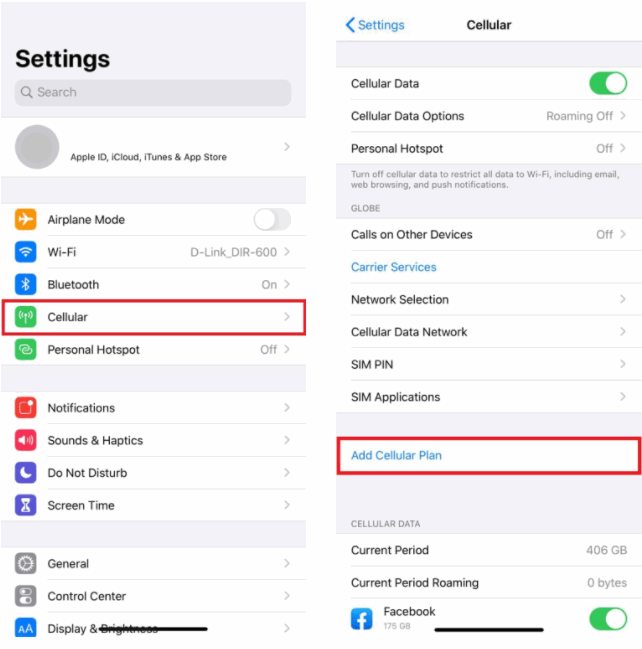
Start by ensuring that your iPhone supports eSIM technology. You can check device compatibility here or by going to Settings > Cellular > Add Cellular Plan. If you see this option, your device is ready to use eSIM.

Step 2. Contact your carrier

Reach out to your mobile carrier’s customer service to obtain an eSIM activation card or a QR code. They will guide you through the process and provide the necessary information.

Step 3. Access cellular settings

In your iPhone settings, navigate to Settings > Cellular > Add Cellular Plan.

Step 4. Scan the QR code

Use your iPhone’s camera to scan the QR code provided by your carrier. Alternatively, enter the details manually if you have received an activation card.

Step 5. Activate eSIM

Follow the on-screen instructions to activate the eSIM. This may involve entering a code or confirming your details with your carrier.

Step 6. Restart your iPhone

Once the setup is complete, restart your iPhone. This ensures that the changes take effect and your device recognizes the new eSIM profile.

How to convert physical SIM to eSIM on iPhone. Image Credit: Canvas

How to transfer SIM to eSIM on Android:

Step 1. Check Device Compatibility

Confirm that your Android device supports eSIM technology. This information is usually found in your device settings under Network & Internet > Mobile Network > Advanced > Carrier.

Step 2. Contact Your Carrier

Get in touch with your carrier to request an eSIM activation code or QR code. They will guide you in obtaining the necessary information.

Step 3. Access Mobile Network Settings

Navigate to Settings > Network & Internet > Mobile Network > Advanced > Carrier.

Step 4. Add eSIM

Choose the option to add an eSIM, then enter the activation code provided by your carrier or scan the QR code they supplied.

Step 5. Complete Setup

Follow the on-screen prompts to complete the eSIM setup. This may include confirming your details and agreeing to terms.

Step 6. Restart Your Android Device

To apply the changes and activate the eSIM, restart your Android device. This step ensures a seamless transition to the new eSIM configuration.

How to convert a physical SIM to an eSIM on Android. Image Credit: Canvas

FAQs

1. Can I convert my existing physical SIM to eSIM?

Yes, in many cases, you can convert your existing physical SIM to an eSIM, but the process may vary depending on your mobile carrier and the capabilities of your device. Follow the steps above if you want to convert physical sim to eSIM.

2. Can I have an eSIM with a physical SIM?

Yes, many smartphones support dual SIM functionality, allowing you to have both an eSIM and a physical SIM card in the same device. This is especially beneficial if you want to maintain two separate phone numbers or use different carriers for different purposes. Check your device’s specifications to make sure compatibility and enjoy the flexibility of using different carriers or numbers simultaneously.

3. How to fix the SIM on your iPhone does not support eSIM transfer?

If you’re encountering the “SIM does not support eSIM transfer” issue on your iPhone, follow these steps: 

  • Confirm your iPhone’s eSIM compatibility
  • Contact your carrier for guidance
  • Update your iOS to the latest version
  • Reset network settings

If the problem persists, go to an Apple Store or authorized service provider for further assistance. Always backup your data before making changes, and be aware that eSIM transfers may be subject to carrier policies and regional availability.

4. Can I use both eSIM and physical SIM for the same number?

Each SIM card, whether eSIM or physical SIM card, is associated with a single mobile number. The eSIM and physical SIM card will have separate mobile numbers, and both can only be used on the same device. Essentially, one phone can accommodate two mobile numbers – one from the eSIM and the other from the physical SIM card.

Wrap up

Now you know the step-by-step guide on how to convert physical SIM to eSIM. It’s really a simple and easy process. Check your phone supports eSIM, initiate the eSIM activation with your carrier, and complete the setup on your device. If you encounter any issues or have questions about the convert SIM to eSIM process, contact your carrier or phone manufacturer for assistance.

Feel free to share your thoughts, experiences, or questions in the comments below. Happy reading!

Related post: How to switch from eSIM to physical SIM?

How to use eSIM on dual SIM phones?

In today’s digital era, we rely heavily on our smartphones for various tasks such as communication, navigation, and accessing information. With the evolution of technology, dual SIM phones have become increasingly popular, offering users the flexibility to use two different SIM cards on a single device. But what about eSIM? Can you use it simultaneously with a regular SIM card? In this article, we will explore how to use eSIM on dual SIM phones and make the most of this cutting-edge technology.

Can I use an eSIM with a regular SIM at the same time? 

The answer is YES! With the advancements in technology, it is now possible to use an eSIM and a regular SIM card simultaneously in dual SIM phones. This offers you the convenience of having two phone numbers on the same device, along with the ability to maintain separate data plans, making it an ideal solution for those who travel frequently or need to separate personal and professional contacts. However, it is crucial to bear in mind that not all dual SIM phones support eSIM functionality. Before proceeding, verifying whether your device is eSIM capable is essential to ensure compatibility. By doing so, you can confidently enjoy the flexibility and benefits of simultaneous use of an eSIM and a regular SIM card.

use esim with physical sim
eSIM allows you to use it at the same time as your regular SIM. Image Credit: Airalo

How to use an eSIM with a regular SIM

Set up your eSIM quickly right on your phone. Image Credit: Apple Tool Box

Setting up a mobile handset with an integrated SIM, or eSIM, is becoming more and more common. Globally, more and more carriers are adopting eSIMs because they allow users to swiftly set up numerous SIM cards and switch networks without having to remove the real SIM card from their handset.

This is how to begin:

Step 1: Check eSIM compatibility

It’s crucial to confirm that your dual SIM phone supports eSIM capabilities before proceeding. Usually, the manufacturer’s website or the phone’s settings provide this information. Verifying compatibility is crucial to ensuring a smooth setup and averting any potential issues.

Step 2: Turn on eSIM

Go to the phone’s settings menu to view the SIM card settings. Seek out the option for adding or activating an eSIM. After you tap on it, you may either scan the QR code or enter the activation code that was supplied. This will start the process of your device’s eSIM addition or activation.

  • This is how you accomplish it on iOS:
    • Go to the Settings on your phone.
    • Select Cellular or Mobile Data.
    • Tap your eSIM plan (usually your “Secondary” line).
    • Turn on Data Roaming.
    • Tap Network Selection and choose a supported network (a list of networks is available in the eSIM’s Additional Information section).
  • Additionally, here’s how to accomplish it on an Android device:
    • Go to the Settings on your phone.
    • Select Network & Internet or Connections.
    • Tap SIM Card.
    • Tap your eSIM plan. 
    • Turn on Data Roaming.
    • Tap Network Selection and choose a supported network (a list of networks is available in the eSIM’s Additional Information section).

Step 3: Follow the setup process

Your phone will lead you step-by-step through the setup procedure when you scan the QR code or enter the activation code. Verifying the eSIM activation is essential before moving on. To choose and alter your data plan in accordance with your unique requirements and preferences, just adhere to the on-screen directions. Your phone will guide you through the process of setting up your eSIM and selecting the best data package, making the process simple.

  • Set Your Default Voice Line: The next step is to configure your voice line. This number will be used for text messaging and phone calls. You should utilise your SIM for voice and text if your eSIM is data-only.  
    • On iOS, you may enable it as follows:
      • Go to the Settings on your phone.
      • Select Cellular or Mobile Data.
      • Select the Default Voice Line by tapping it.
      • Select your SIM line.
    • Additionally, here’s how to activate it on an Android device:
      • Go to the Settings on your phone.
      • Tap Network & Internet or Connections.
      • Tap SIM Card.
      • Tap Calls and select your SIM line.
      • Tap Texts and select your SIM line.
  • Choose Your Cellular Data Line: Cellular data may only be used by one line at a time. That will be your US eSIM line when you are in the country.
    • This is how to configure it on iOS:
      • Go to the Settings on your phone.
      • Select Cellular or Mobile Data.
      • Tap Cellular Data.
      • Select your eSIM line.
    • Furthermore, here’s how to configure it on an Android device:
      • Go to the Settings on your phone.
      • Network & Internet or Connections.
      • Press SIM Card.
      • Select Data Service Network. 
      • Select your eSIM line. 

Step 4: Use both SIM cards

Once the eSIM has been properly configured, you may select which SIM to use for messages, calls, and data. Generally, you may use the SIM card settings or the quick settings window on your smartphone to move between SIM cards. You may then choose the suitable SIM for your communication requirements.

It is noteworthy that the procedure for configuring your multi-SIM phone may differ significantly based on its make and model. Assisting yourself with specific queries or worries during setup may be achieved by consulting the user manual or getting in touch with the manufacturer. They have the skills and know-how to guide you through any possible problems and guarantee a successful setup.

Wrap Up

In conclusion, dual SIM phones with eSIM integration provide users with a level of versatility never before possible. This article has provided a clear guide on how to use eSIM alongside a regular SIM card, emphasizing the importance of checking compatibility before setup. As technology evolves, the simultaneous use of eSIM and regular SIM cards enhances user convenience, allowing for efficient management of multiple numbers and seamless network switching without physical SIM cards.

If this information was useful to you, please like, share, or leave a comment. We would be interested in hearing about any more advice you may have or your experiences using eSIM on dual SIM phones. Keep checking back for more thought-provoking tech guides.

How to activate an eSIM? A 5-minute guide for beginners

Nowadays, the advent of eSIM has revolutionized the way we connect. Unlike traditional physical SIM cards, eSIMs are integrated directly into your device, paving the way for a more fast and convenient mobile experience. If you’re wondering how to activate eSIM and unlock the full potential of your device, you’ve come to the right place. In this comprehensive guide, we’ll walk you through the process step by step, ensuring hassle-free activation.

How to activate an eSIM on Android?

More and more Android smartphones these days are stepping up their game with eSIM connectivity. Some of them are even going above and beyond, throwing in dual-SIM capability alongside the good old physical SIM. 

But the real question is, how do you join the simplistic eSIM lifestyle? If you’re ready to make the switch, here’s your guide on how to activate eSIM on Android.

Step 1: Open the Settings app

Navigate to your phone’s Settings app. Look for the icon that resembles a mechanical cog wheel, though its appearance might vary depending on your smartphone model.

activate esim on Android
Activating eSIM on Android is so easy and simple. Credit Image: Trusted Reviews

Step 2: Access Network & internet

Once in the Settings app, tap on “Network & Internet.” You’ll often find this option at the top of the app menu.

activate esim on Android
Make sure your device has a Wi-Fi connection. Credit Image: Trusted Reviews

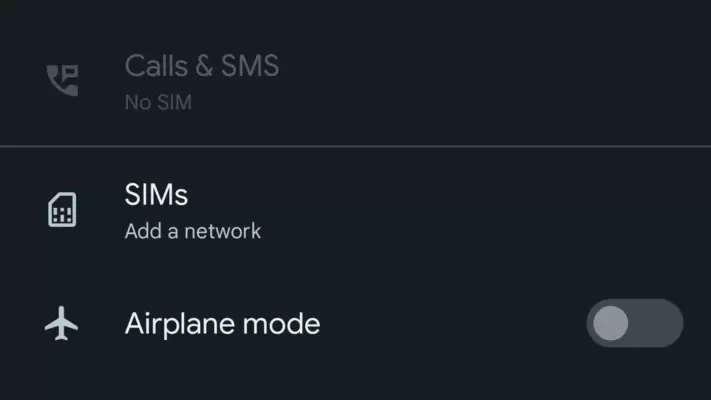
Step 3: Select SIMs

Within the Network & Internet menu, locate and tap on “SIMs.” This is the section where you can manage your SIM card settings. 

Pick SIMs and you can manage your SIM card in this section. Credit Image: Trusted Reviews

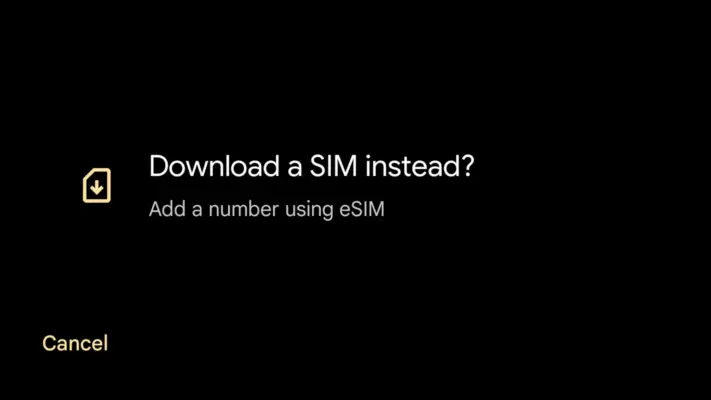
Step 4: Choose ‘Use eSIM instead’

If your phone currently uses a physical SIM card, you’ll see options related to that. However, since we’re focusing on the eSIM, remove the physical SIM card using the ejection tool (if needed).

Then, go back to the menu and tap on ‘Use eSIM instead’ at the bottom of the page. Confirm by tapping ‘Next’ on the following page.

Remove the physical SIM card and replace it with your eSIM to use. Credit Image: Trusted Reviews

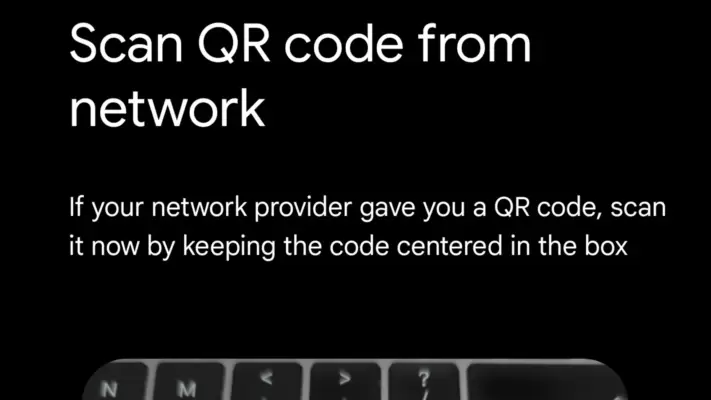
Step 5: Scan the eSIM QR Code

Now, it’s time to scan the eSIM QR code provided by your network carrier. This QR code usually comes with your eSIM or when upgrading your contract to an eSIM variant. If you don’t have a QR code, simply give your carrier a quick call for assistance. (Recommnedation: How to get a QR code for eSIM?)

After scanning the QR code, your eSIM will be activated and ready for use. Credit Image: Trusted Reviews

How to activate an eSIM on iOS?

Setting up and activating an eSIM on an iPhone can be done in a variety of ways, but the most common method is using a QR code. Let’s explore two methods on how to activate eSIM on iOS below. Keep in mind that the steps may vary depending on the iPhone model and iOS version you are currently using.

Scan a QR Code 

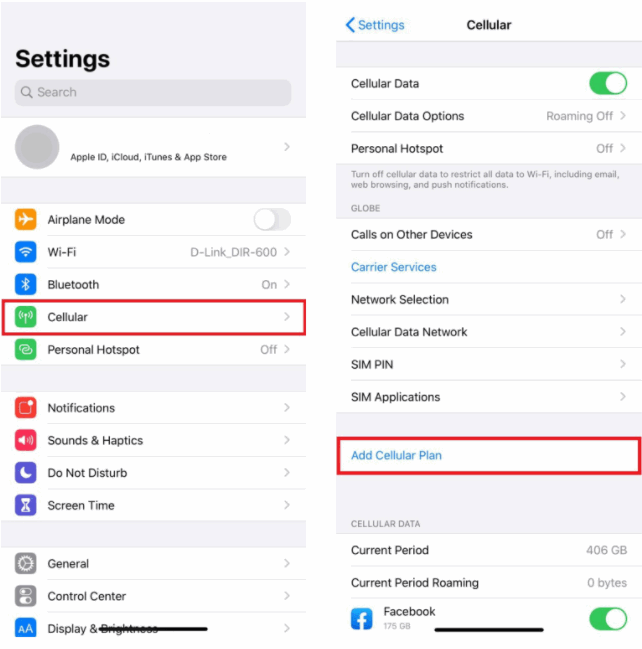
Step 1:  Navigate to Settings on your iPhone.

Step 2: Tap on Cellular or Mobile.

Step 3: Select Add Cellular Plan or Add Mobile Data Plan.

activate esim on ios
Follow our steps and images above to active your eSIM. Image Credit: Airalo

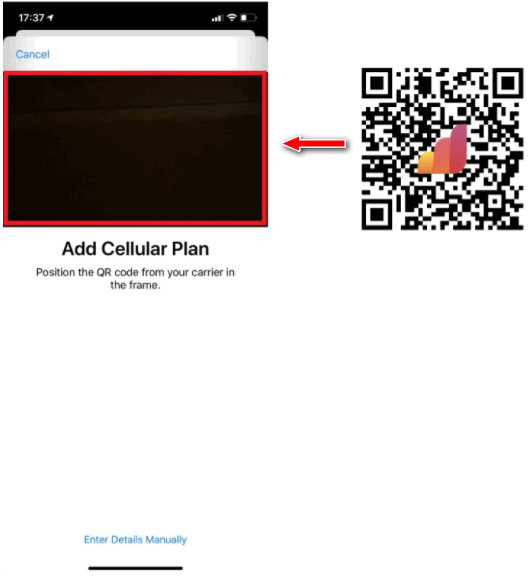
Step 4: Use a printed QR code or another device displaying the QR code to scan your eSIM QR code.

Position the QR code from your carrier in the frame. Image Credit: Airalo

Step 5: Enter a 4-digit confirmation code if prompted (skip if not provided).

Step 6: Choose a label or customize label for your eSIM.

Step 7: Under the Default Line page, select your eSIM for cellular data only.

Step 8: Your new eSIM should now be visible under Cellular Data or Mobile Data Plans.

Manual activation

Step 1: Similar to scan a QR code method, go to Settings and click Cellular or Mobile.

Step 2: Choose Add Cellular Plan or Add Mobile Data Plan.

Tap on these buttons to initiate the eSIM activation process. Image Credit: Airalo

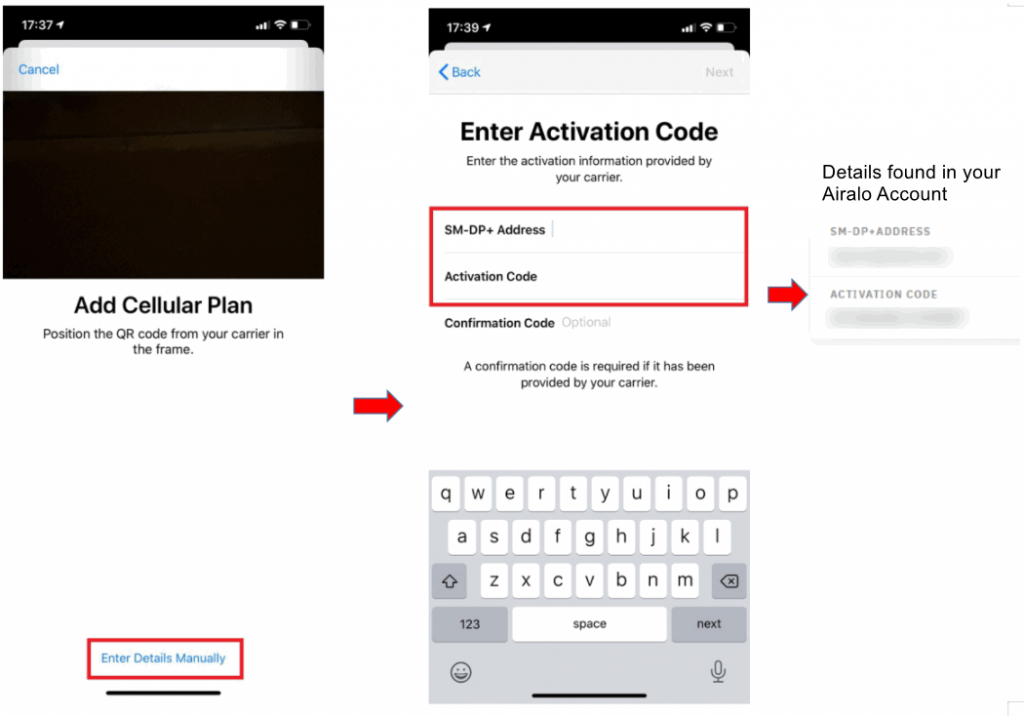
Step 3: Opt for Enter Details Manually. You will be prompted to enter:

  • SM-DP+ Address
  • Activation Code
  • Confirmation Code
For more detail, see this image. Image Credit: Airalo

Step 4: Choose a label for your eSIM.

Step 5: Select the line for cellular data usage.

Step 6: Tap continue, and your virtual SIM is ready for use in the settings.

Related posts:

How to activate an eSIM on US carriers?

Activating an eSIM on US carriers involves a few specific steps, but the exact process can vary slightly depending on the carrier (To know if your US carrier supports eSIM, check here). Here’s a general guide that you can follow on how to activate eSIM:

Check with your carrier for specific requirements and support. Image Credit: Canvas

Activate an eSIM on T-mobile

iPhone:

  1. Ensure a stable Wi-Fi connection.
  2. Wait for the notification indicating that your Metro by T-Mobile cellular plan is ready.
  3. Tap the notification to finalize your eSIM activation and connect to the Metro by T-Mobile network.

If you didn’t receive the notification:

  1. Go to Settings > Cellular > Add Cellular Plan from your home screen.
  2. Use your phone camera to scan the QR code or manually enter the SMDP+ address below.
  3. Tap Add Cellular Plan.

Samsung:

  1. Confirm a reliable Wi-Fi connection.
  2. From your home screen, navigate to Settings > Connections > SIM card manager > Add Mobile Plan > Scan Carrier QR Code.
  3. Use your phone camera to scan the QR code or manually input the SMDP+ address.
  4. Click Confirm.

Pixel:

  1. Make sure a stable Wi-Fi connection.
  2. From your home screen, go to Settings > Network & Internet.
  3. Next to SIMs, select the plus symbol, tap Download your SIM > Next > T-Mobile.
  4. Use your phone camera to scan the QR code or manually enter the SMDP+ address.
  5. Tap Confirm.

SM-DP+ Address: T-MOBILE.GDSB.NET

Further reading: A complete guide to activate eSIM on T-mobile

Activate an eSIM on Verizon

Step 1: Confirm that your device supports eSIM and is compatible with Verizon’s eSIM service.

Step 2: Obtain an eSIM activation kit or QR code from a Verizon store or contact customer service.

Step 3: Navigate to Settings on your device.

Step 4: Find and tap on the Cellular or Mobile option.

Step 5: Select “Add Cellular Plan“.

Step 6: Use your phone’s camera to scan the eSIM QR code provided by Verizon.

Step 7: Complete any additional steps as prompted on your device.

Further reading: A complete guide to activate eSIM on Verizon

Activate an eSIM on Sprint

Sprint is now T-mobile, so follow the guide above to activate your eSIM.

Activate an eSIM on Cricket

Step 1: Ensure your phone is unlocked, eSIM-capable, and compatible with Cricket Wireless. You can verify this using Cricket’s Compatibility Checker.

Step 2: Make sure your phone is connected to a WiFi network for a smooth activation process.

Step 3: Activate your service online at cricketwireless.com or visit any Cricket Retail Store. During activation, opt for the eSIM option.

Further reading: A complete guide to activate eSIM on Cricket

Activate an eSIM on AT&T

To activate an eSIM on AT&T, here’s a concise guide on how to activate eSIM for you:

  1. Log in to your myAT&T account.
  2. Navigate to “My devices” and select “Manage wireless” for the device requiring the eSIM.
  3. Download the eSIM over Wi-Fi if your device is on an active plan.
  4. If you have an eSIM activation card, go to SIM card manager, select “Add mobile plan,” and follow the prompts to scan the QR code.

Troubleshooting (if needed):

For troubleshooting, sign in to your myAT&T account, scroll to “My devices,” and choose “Manage wireless” for the device needing a new eSIM.

Further reading: A complete guide to activate eSIM on AT&T

FAQs

1. How long does it take to activate an eSIM?

Activating an eSIM takes a few minutes to a few hours. Usually, if everything is in order with the carrier’s network and the QR code is valid, the activation process can be completed within 5 to 10 minutes. Keep in mind that specific factors, such as carrier procedures and device compatibility, may affect the duration of the activation process.

2. Where is the activation code for eSIM?

After setting up your iPhone, activating your eSIM is a breeze. Just reach out to your carrier to obtain a QR code, and then follow these simple steps: Open your Camera app, scan the QR code, and when the “Cellular Plan Detected” notification pops up, just give it a tap. 

3. Why can’t I activate an eSIM?

If you’re having trouble activating an eSIM, consider these common issues:

  • Device compatibility: Make sure your device supports eSIM technology by checking its specifications. You can check device compatibility here.
  • Carrier support: Confirm that your carrier offers eSIM activation and that it is supported in your region. If you use eSIM from Esimwise and don’t know how to activate eSIM, reach out to our Esimwise support for further guidance.
  • Internet connection: Use a stable Wi-Fi connection during the activation process to avoid issues.
  • QR Code issues: Check the QR code for validity and ensure it matches the carrier’s information.
  • Device software update: Make sure your device has the latest software updates installed.
  • Confirmation code: If required, enter the confirmation code correctly as provided by your carrier.
  • SIM card slot: Remove the physical SIM card if switching to an eSIM, as some devices require this step.

Wrap up

And there you have it — a step-by-step guide on how to activate eSIM! Remember, if you ever find yourself facing challenges during activation, feel free to reach out to your carrier’s support. With the flexibility to switch carriers without swapping physical cards, eSIM technology is definitely the future of mobile communications. Enjoy the convenience and freedom that eSIM brings as you stay connected in this fast-paced digital age. Happy exploring!

eSIM 101: What is an eSIM? How does it work?

what is an esim

eSIMs are changing the way we stay connected, and while they’re super cool, they can still be a bit of a mystery to many. Luckily for you, we’ve got you covered on everything you need to know about eSIMs. Stay tuned to find out exactly: What is an eSIM? How does it work? What are the benefits it offers? and more. Let’s learn and explore the eSIM world together!

What is an eSIM?

eSIM or embedded SIM is a component built into devices such as smartphones and tablets. eSIM works just like a traditional SIM card but without the need to swap it manually. According to the GSMA Intelligence report, it is expected that by 2025, 98% of carriers will offer eSIM and all devices will be equipped with them. This technology simplifies travel connectivity, potentially rendering the process of purchasing a physical SIM card obsolete. eSIM will make travel more straightforward and flexible.

what is an esim
eSIM allows users to activate a cellular plan from their carrier without a physical card. Image Credit: Canvas

How does an eSIM work?

So you have this useful feature on your phone or tablet. It’s just like a regular SIM card but without having to swap SIMs in and out every time you want to switch service providers.

How does esim work
Installing the eSIM is so easy, just a few minutes and you’re ready to roam. Image Credit: US Mobile

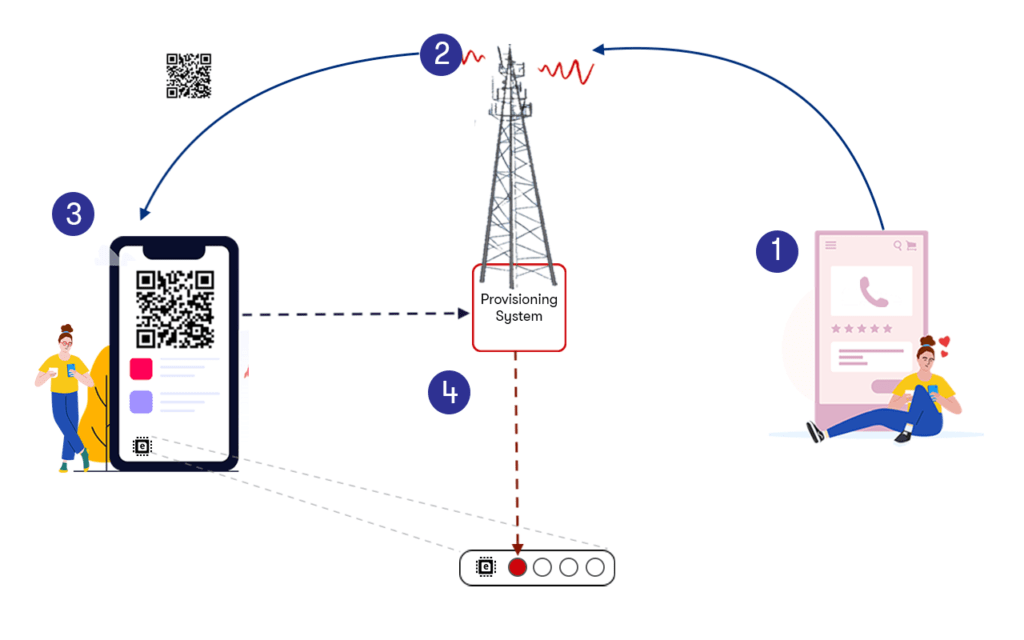
Now, to get this convenient eSIM working, you’ll need to buy one and pick a data plan. Once that’s sorted, you will receive a QR code via email. Just scan it and your eSIM is ready to roam!

And get this – you can use up to 10 eSIMs on one phone. That means you can switch between different service providers without using multiple annoying physical SIM cards. Whether you’re a backpacker, a business traveler, or just chilling on the beach now and then, eSIM can be a game changer. They save you time, money, and the stress of dealing with a bunch of SIM cards. Isn’t it amazing?

What are the advantages of eSIM?

Switching from physical SIM to eSIM brings countless benefits, transforming how we stay connected and ending unwanted roaming charges. From staying connected on the go to saying goodbye to unexpected charges, here are some ways using an eSIM can truly be a game-changer.

eSIM enhances user convenience and provides improved security features. Image Credit: Canvas

Remote provisioning

One of the outstanding advantages of eSIM technology is the capability for remote provisioning. This means users can activate or switch between mobile carriers without the need for a physical SIM card. This is especially beneficial for frequent travelers, who can seamlessly connect to local carriers without the hassle of obtaining and changing physical SIM cards.

Flexibility and convenience

The flexibility offered by eSIMs is a game-changer. Users can effortlessly switch between mobile carriers and plans without the need for physical SIM card swaps. This not only saves time but also gives users the convenience of choosing the package that best suits their needs at any given time.

Streamlined activation process

Activating an eSIM is a hassle-free process. With just a few clicks, users can activate their eSIM, eliminating the need for inserting a physical card into the device. This simplicity not only saves time but also makes it more accessible for users of varying technical expertise.

Space-saving

The compact nature of eSIM technology contributes to space savings in the device’s design. Without the need for a physical SIM card slot, manufacturers can optimize device layouts. This makes them more efficient and potentially allows for additional features or sleeker designs.

Enhanced security

Security is paramount and eSIM contributes to this by reducing the risks associated with physical SIM cards. With no removable cards, the risk of damage, loss, or theft is minimized. Additionally, remote eSIM provisioning can be done securely, enhancing overall data protection. Further reading: Can eSIM be hacked?

Better integration with IoT devices

The seamless integration of eSIM technology with Internet of Things (IoT) devices is remarkable. This enables efficient connectivity in a variety of smart devices, such as wearables and smart devices, without the need for a physical SIM card slot.

Better for the environment

The shift to eSIMs aligns with environmental concerns. By eliminating the need for physical SIM cards and their associated packaging, eSIMs contribute to a reduction in electronic waste. This eco-friendly aspect makes eSIMs a more sustainable choice in the long run.

What are the disadvantages of eSIM?

Now, you know what an eSIM is. It’s time to learn more about its downside. One significant drawback of eSIM technology is the inconvenience it causes for those who are used to swapping a SIM card between different devices. Unlike the simple process of inserting a physical card, converting an eSIM requires an activation process each time, which can be logistically challenging.

Despite carriers being philosophically okay with this, the practical complexities may still disrupt activation systems. This makes the process of swapping eSIMs between devices less simple than desired.

While eSIM offers numerous benefits, it also has some disadvantages. Image Credit: Canvas

FAQs

1. Does eSIM use your phone number?

Absolutely! The eSIM technology works just like a traditional SIM card in terms of associating with your phone number. When you activate an eSIM, it is essentially linked to your mobile subscription, complete with your phone number and all the usual functions. So whether you’re using a physical SIM or an eSIM, your phone number is an integral part of your device’s identity, ensuring you stay connected with friends, family, and colleagues. Further reading: How to get an eSIM with a phone number?

2. Do you need the internet for an eSIM?

Yes, to activate and manage an eSIM, you need an internet connection. The initial setup, updates, as well as connecting to mobile networks are all digital processes that depend on internet access. Once activated, an eSIM allows you to use mobile data, make calls, and send messages without needing a constant internet connection, similar to a traditional SIM card. However, for initial setup and ongoing management, internet access is often necessary.

3. Can you call and text with eSIM?

Certainly! With an eSIM, you can make calls and send text messages, just like you would with a traditional SIM card. Once the eSIM is activated, it essentially acts as your virtual SIM, enabling all the communication features you would expect on your device. So whether you’re reaching out to friends, family, or colleagues, or just sending a quick text, eSIM lets you stay connected and in touch seamlessly.

Wrap up

In short, the era of eSIM technology has arrived, so understanding “what is an eSIM” is crucial. It brings with it a wave of innovation and convenience. The transition from physical SIM to embedded SIM marks an important milestone in the evolution of mobile connectivity. As users, manufacturers, and service providers adapt to this change, the benefits of eSIM will undoubtedly shape the future of how we connect and interact with our devices.

Robot Vacuums and Mops Keep Your Floors Sparkling Clean

Lorem ipsum dolor sit amet, consectetur adipiscing elit, sed do eiusmod tempor incididunt ut labore et dolore magna aliqua. Quis ipsum suspendisse ultrices gravida. Risus commodo viverra maecenas accumsan lacus vel facilisis.

Duis aute irure dolor in reprehenderit in voluptate velit esse cillum dolore eu fugiat nulla pariatur. Excepteur sint occaecat cupidatat non proident, sunt in culpa qui officia deserunt mollit anim id est laborum.

Sed ut perspiciatis unde omnis iste natus error sit voluptatem accusantium doloremque laudantium, totam rem aperiam, eaque ipsa quae ab illo inventore veritatis et quasi architecto beatae vitae dicta sunt explicabo. Nemo enim ipsam voluptatem quia voluptas sit aspernatur aut odit aut fugit, sed quia consequuntur magni dolores eos qui ratione voluptatem sequi nesciunt.

Neque porro quisquam est, qui dolorem ipsum quia dolor sit amet, consectetur, adipisci velit, sed quia non numquam eius modi tempora incidunt ut labore et dolore magnam aliquam quaerat voluptatem.

Neque por quisquam est, qui dolorem ipsum quia dolor sit amet!

Kyren Wilson

Lorem ipsum dolor sit amet, consectetur adipisicing elit, sed do eiusmod tempor incididunt ut labore et dolore magna aliqua. Ut enim ad minim veniam, quis nostrud exercitation ullamco laboris nisi ut aliquip.

Excepteur sint occaecat cupidatat non proident, sunt in culpa qui officia deserunt mollit anim id est laborum. Sed ut perspiciatis unde omnis iste natus error sit voluptatem accusantium doloremque laudantium, totam rem aperiam, eaque ipsa quae ab illo inventore veritatis et quasi architecto beatae vitae dicta sunt explicabo.

Nemo enim ipsam voluptatem quia voluptas sit aspernatur aut odit aut fugit, sed quia consequuntur magni dolores eos qui ratione voluptatem sequi nesciunt. Neque porro quisquam est, qui dolorem ipsum quia dolor sit amet, consectetur, adipisci velit.

Sed quia non numquam eius modi tempora incidunt ut labore et dolore magnam aliquam quaerat voluptatem.

Six pieces under $55 to upgrade your spring wardrobe

Lorem ipsum dolor sit amet, consectetur adipiscing elit, sed do eiusmod tempor incididunt ut labore et dolore magna aliqua. Quis ipsum suspendisse ultrices gravida. Risus commodo viverra maecenas accumsan lacus vel facilisis.

Duis aute irure dolor in reprehenderit in voluptate velit esse cillum dolore eu fugiat nulla pariatur. Excepteur sint occaecat cupidatat non proident, sunt in culpa qui officia deserunt mollit anim id est laborum.

Sed ut perspiciatis unde omnis iste natus error sit voluptatem accusantium doloremque laudantium, totam rem aperiam, eaque ipsa quae ab illo inventore veritatis et quasi architecto beatae vitae dicta sunt explicabo. Nemo enim ipsam voluptatem quia voluptas sit aspernatur aut odit aut fugit, sed quia consequuntur magni dolores eos qui ratione voluptatem sequi nesciunt.

Neque porro quisquam est, qui dolorem ipsum quia dolor sit amet, consectetur, adipisci velit, sed quia non numquam eius modi tempora incidunt ut labore et dolore magnam aliquam quaerat voluptatem.

Neque por quisquam est, qui dolorem ipsum quia dolor sit amet!

Kyren Wilson

Lorem ipsum dolor sit amet, consectetur adipisicing elit, sed do eiusmod tempor incididunt ut labore et dolore magna aliqua. Ut enim ad minim veniam, quis nostrud exercitation ullamco laboris nisi ut aliquip.

Excepteur sint occaecat cupidatat non proident, sunt in culpa qui officia deserunt mollit anim id est laborum. Sed ut perspiciatis unde omnis iste natus error sit voluptatem accusantium doloremque laudantium, totam rem aperiam, eaque ipsa quae ab illo inventore veritatis et quasi architecto beatae vitae dicta sunt explicabo.

Nemo enim ipsam voluptatem quia voluptas sit aspernatur aut odit aut fugit, sed quia consequuntur magni dolores eos qui ratione voluptatem sequi nesciunt. Neque porro quisquam est, qui dolorem ipsum quia dolor sit amet, consectetur, adipisci velit.

Sed quia non numquam eius modi tempora incidunt ut labore et dolore magnam aliquam quaerat voluptatem.

Discover great value style for every room

Lorem ipsum dolor sit amet, consectetur adipiscing elit, sed do eiusmod tempor incididunt ut labore et dolore magna aliqua. Quis ipsum suspendisse ultrices gravida. Risus commodo viverra maecenas accumsan lacus vel facilisis.

Duis aute irure dolor in reprehenderit in voluptate velit esse cillum dolore eu fugiat nulla pariatur. Excepteur sint occaecat cupidatat non proident, sunt in culpa qui officia deserunt mollit anim id est laborum.

Sed ut perspiciatis unde omnis iste natus error sit voluptatem accusantium doloremque laudantium, totam rem aperiam, eaque ipsa quae ab illo inventore veritatis et quasi architecto beatae vitae dicta sunt explicabo. Nemo enim ipsam voluptatem quia voluptas sit aspernatur aut odit aut fugit, sed quia consequuntur magni dolores eos qui ratione voluptatem sequi nesciunt.

Neque porro quisquam est, qui dolorem ipsum quia dolor sit amet, consectetur, adipisci velit, sed quia non numquam eius modi tempora incidunt ut labore et dolore magnam aliquam quaerat voluptatem.

Neque por quisquam est, qui dolorem ipsum quia dolor sit amet!

Kyren Wilson

Lorem ipsum dolor sit amet, consectetur adipisicing elit, sed do eiusmod tempor incididunt ut labore et dolore magna aliqua. Ut enim ad minim veniam, quis nostrud exercitation ullamco laboris nisi ut aliquip.

Excepteur sint occaecat cupidatat non proident, sunt in culpa qui officia deserunt mollit anim id est laborum. Sed ut perspiciatis unde omnis iste natus error sit voluptatem accusantium doloremque laudantium, totam rem aperiam, eaque ipsa quae ab illo inventore veritatis et quasi architecto beatae vitae dicta sunt explicabo.

Nemo enim ipsam voluptatem quia voluptas sit aspernatur aut odit aut fugit, sed quia consequuntur magni dolores eos qui ratione voluptatem sequi nesciunt. Neque porro quisquam est, qui dolorem ipsum quia dolor sit amet, consectetur, adipisci velit.

Sed quia non numquam eius modi tempora incidunt ut labore et dolore magnam aliquam quaerat voluptatem.

Rounding Up the Summer 2021 Move to Zero Footwear

Lorem ipsum dolor sit amet, consectetur adipiscing elit, sed do eiusmod tempor incididunt ut labore et dolore magna aliqua. Quis ipsum suspendisse ultrices gravida. Risus commodo viverra maecenas accumsan lacus vel facilisis.

Duis aute irure dolor in reprehenderit in voluptate velit esse cillum dolore eu fugiat nulla pariatur. Excepteur sint occaecat cupidatat non proident, sunt in culpa qui officia deserunt mollit anim id est laborum.

Sed ut perspiciatis unde omnis iste natus error sit voluptatem accusantium doloremque laudantium, totam rem aperiam, eaque ipsa quae ab illo inventore veritatis et quasi architecto beatae vitae dicta sunt explicabo. Nemo enim ipsam voluptatem quia voluptas sit aspernatur aut odit aut fugit, sed quia consequuntur magni dolores eos qui ratione voluptatem sequi nesciunt.

Neque porro quisquam est, qui dolorem ipsum quia dolor sit amet, consectetur, adipisci velit, sed quia non numquam eius modi tempora incidunt ut labore et dolore magnam aliquam quaerat voluptatem.

Neque por quisquam est, qui dolorem ipsum quia dolor sit amet!

Kyren Wilson

Lorem ipsum dolor sit amet, consectetur adipisicing elit, sed do eiusmod tempor incididunt ut labore et dolore magna aliqua. Ut enim ad minim veniam, quis nostrud exercitation ullamco laboris nisi ut aliquip.

Excepteur sint occaecat cupidatat non proident, sunt in culpa qui officia deserunt mollit anim id est laborum. Sed ut perspiciatis unde omnis iste natus error sit voluptatem accusantium doloremque laudantium, totam rem aperiam, eaque ipsa quae ab illo inventore veritatis et quasi architecto beatae vitae dicta sunt explicabo.

Nemo enim ipsam voluptatem quia voluptas sit aspernatur aut odit aut fugit, sed quia consequuntur magni dolores eos qui ratione voluptatem sequi nesciunt. Neque porro quisquam est, qui dolorem ipsum quia dolor sit amet, consectetur, adipisci velit.

Sed quia non numquam eius modi tempora incidunt ut labore et dolore magnam aliquam quaerat voluptatem.

5 easy ways to boost your emotional fitness

Lorem ipsum dolor sit amet, consectetur adipiscing elit, sed do eiusmod tempor incididunt ut labore et dolore magna aliqua. Quis ipsum suspendisse ultrices gravida. Risus commodo viverra maecenas accumsan lacus vel facilisis.

Duis aute irure dolor in reprehenderit in voluptate velit esse cillum dolore eu fugiat nulla pariatur. Excepteur sint occaecat cupidatat non proident, sunt in culpa qui officia deserunt mollit anim id est laborum.

Sed ut perspiciatis unde omnis iste natus error sit voluptatem accusantium doloremque laudantium, totam rem aperiam, eaque ipsa quae ab illo inventore veritatis et quasi architecto beatae vitae dicta sunt explicabo. Nemo enim ipsam voluptatem quia voluptas sit aspernatur aut odit aut fugit, sed quia consequuntur magni dolores eos qui ratione voluptatem sequi nesciunt.

Neque porro quisquam est, qui dolorem ipsum quia dolor sit amet, consectetur, adipisci velit, sed quia non numquam eius modi tempora incidunt ut labore et dolore magnam aliquam quaerat voluptatem.

Neque por quisquam est, qui dolorem ipsum quia dolor sit amet!

Kyren Wilson

Lorem ipsum dolor sit amet, consectetur adipisicing elit, sed do eiusmod tempor incididunt ut labore et dolore magna aliqua. Ut enim ad minim veniam, quis nostrud exercitation ullamco laboris nisi ut aliquip.

Excepteur sint occaecat cupidatat non proident, sunt in culpa qui officia deserunt mollit anim id est laborum. Sed ut perspiciatis unde omnis iste natus error sit voluptatem accusantium doloremque laudantium, totam rem aperiam, eaque ipsa quae ab illo inventore veritatis et quasi architecto beatae vitae dicta sunt explicabo.

Nemo enim ipsam voluptatem quia voluptas sit aspernatur aut odit aut fugit, sed quia consequuntur magni dolores eos qui ratione voluptatem sequi nesciunt. Neque porro quisquam est, qui dolorem ipsum quia dolor sit amet, consectetur, adipisci velit.

Sed quia non numquam eius modi tempora incidunt ut labore et dolore magnam aliquam quaerat voluptatem.

Fitbit announces new wellness tracker called Luxe

Lorem ipsum dolor sit amet, consectetur adipiscing elit, sed do eiusmod tempor incididunt ut labore et dolore magna aliqua. Quis ipsum suspendisse ultrices gravida. Risus commodo viverra maecenas accumsan lacus vel facilisis.

Duis aute irure dolor in reprehenderit in voluptate velit esse cillum dolore eu fugiat nulla pariatur. Excepteur sint occaecat cupidatat non proident, sunt in culpa qui officia deserunt mollit anim id est laborum.

Sed ut perspiciatis unde omnis iste natus error sit voluptatem accusantium doloremque laudantium, totam rem aperiam, eaque ipsa quae ab illo inventore veritatis et quasi architecto beatae vitae dicta sunt explicabo. Nemo enim ipsam voluptatem quia voluptas sit aspernatur aut odit aut fugit, sed quia consequuntur magni dolores eos qui ratione voluptatem sequi nesciunt.

Neque porro quisquam est, qui dolorem ipsum quia dolor sit amet, consectetur, adipisci velit, sed quia non numquam eius modi tempora incidunt ut labore et dolore magnam aliquam quaerat voluptatem.

Neque por quisquam est, qui dolorem ipsum quia dolor sit amet!

Kyren Wilson

Lorem ipsum dolor sit amet, consectetur adipisicing elit, sed do eiusmod tempor incididunt ut labore et dolore magna aliqua. Ut enim ad minim veniam, quis nostrud exercitation ullamco laboris nisi ut aliquip.

Excepteur sint occaecat cupidatat non proident, sunt in culpa qui officia deserunt mollit anim id est laborum. Sed ut perspiciatis unde omnis iste natus error sit voluptatem accusantium doloremque laudantium, totam rem aperiam, eaque ipsa quae ab illo inventore veritatis et quasi architecto beatae vitae dicta sunt explicabo.

Nemo enim ipsam voluptatem quia voluptas sit aspernatur aut odit aut fugit, sed quia consequuntur magni dolores eos qui ratione voluptatem sequi nesciunt. Neque porro quisquam est, qui dolorem ipsum quia dolor sit amet, consectetur, adipisci velit.

Sed quia non numquam eius modi tempora incidunt ut labore et dolore magnam aliquam quaerat voluptatem.

SHOPPING CART

You haven't added products to the cart

Shop now!

Total: USD $0